WordPress
Introduction
The BillDesk WordPress plugin allows merchants to set up payments for any WordPress website.
Merchants can download the plugin with the following link.
Prerequisites
Ensure that the merchant has downloaded, installed, and configured WordPress version 6.8.2
Integration Steps
Installation and Activation
Follow the steps below to install and activate the BillDesk WordPress plugin.
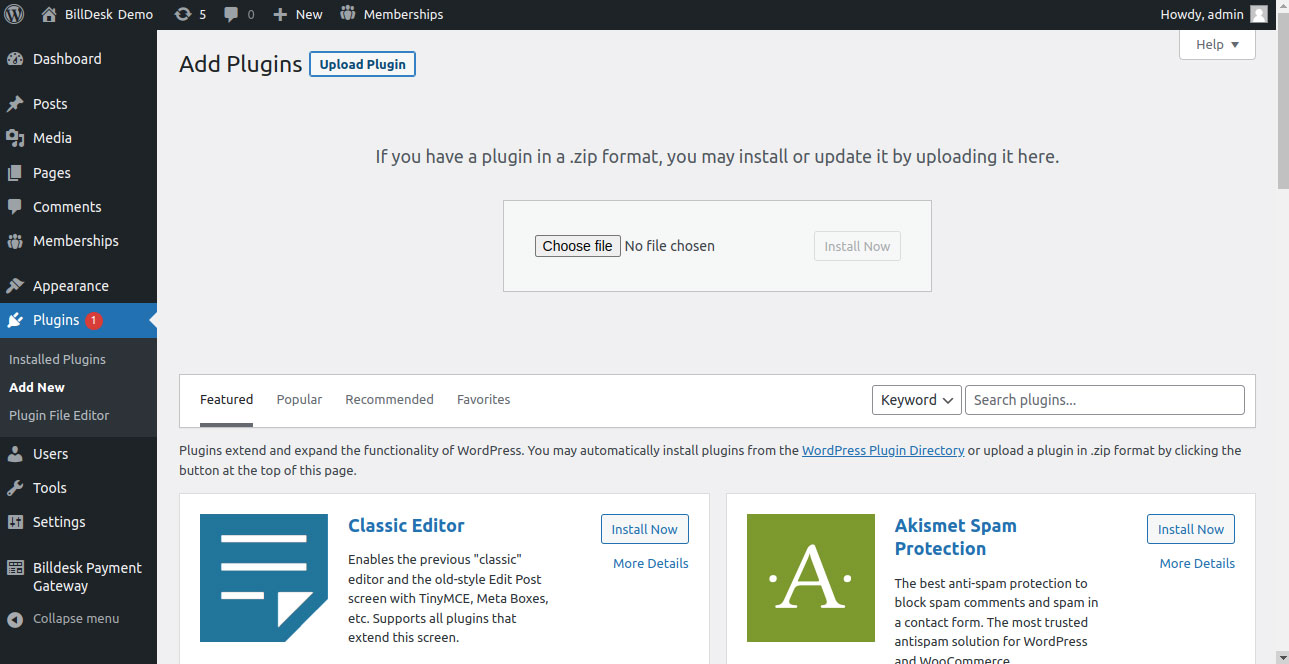
Installation
The plugin can be installed in two ways:
-
Uploading the plugin from the admin panel in Plugins → Add New → Add Plugins → Upload Plugin.
- Choose the BillDesk WordPress plugin file and click on Install Now.
-
Manually installing the plugin in WordPress:
- Extract the shared plugin archive file and copy it to wp-content/plugins/ folder within the WordPress deployment.
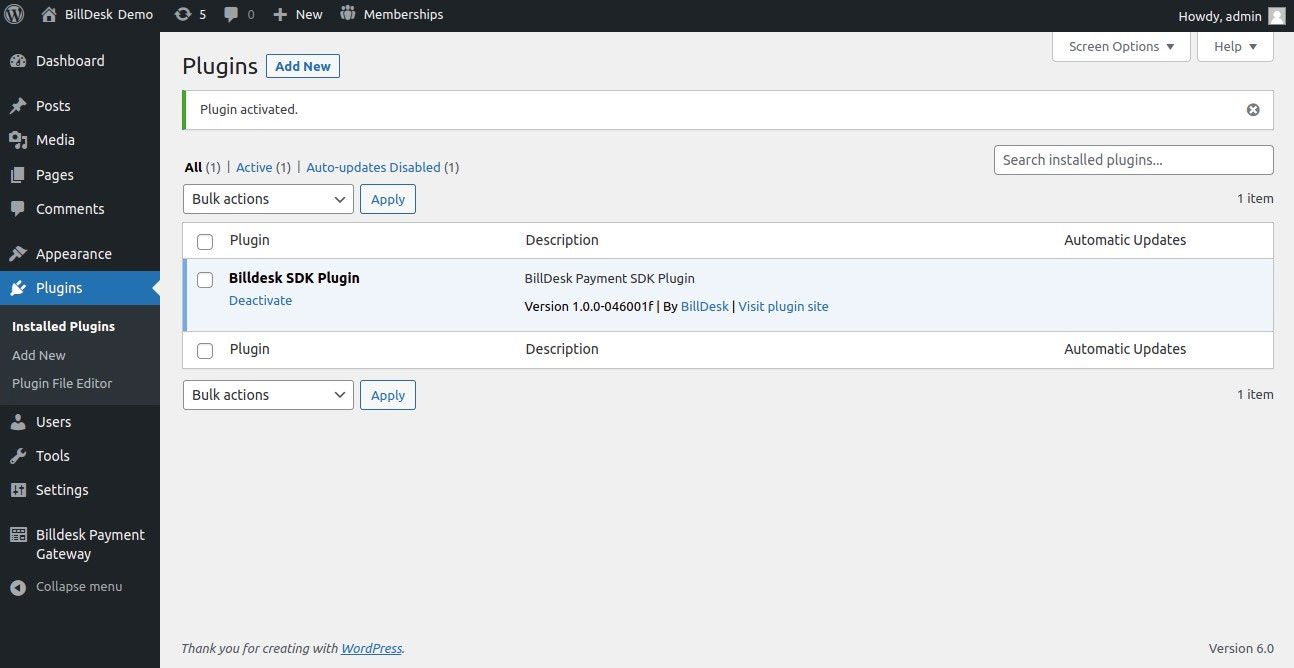
Activation
- Click Activate Plugin.
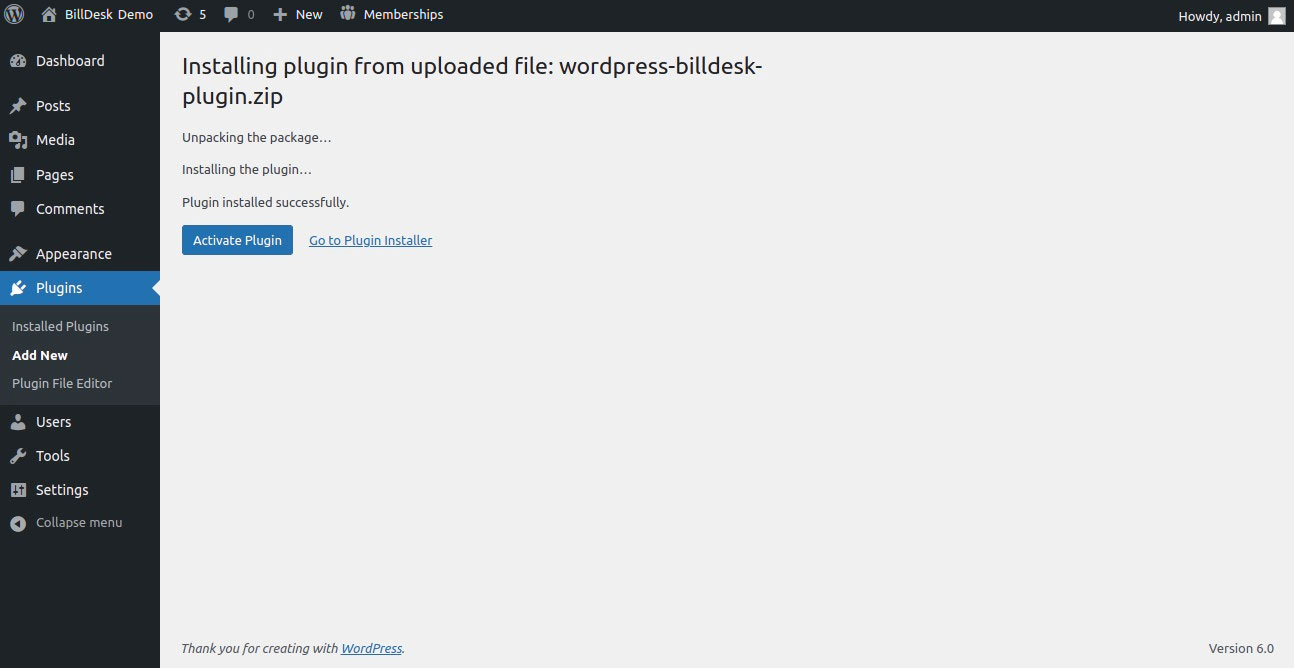
- Installation Successful!
Plugin Configuration
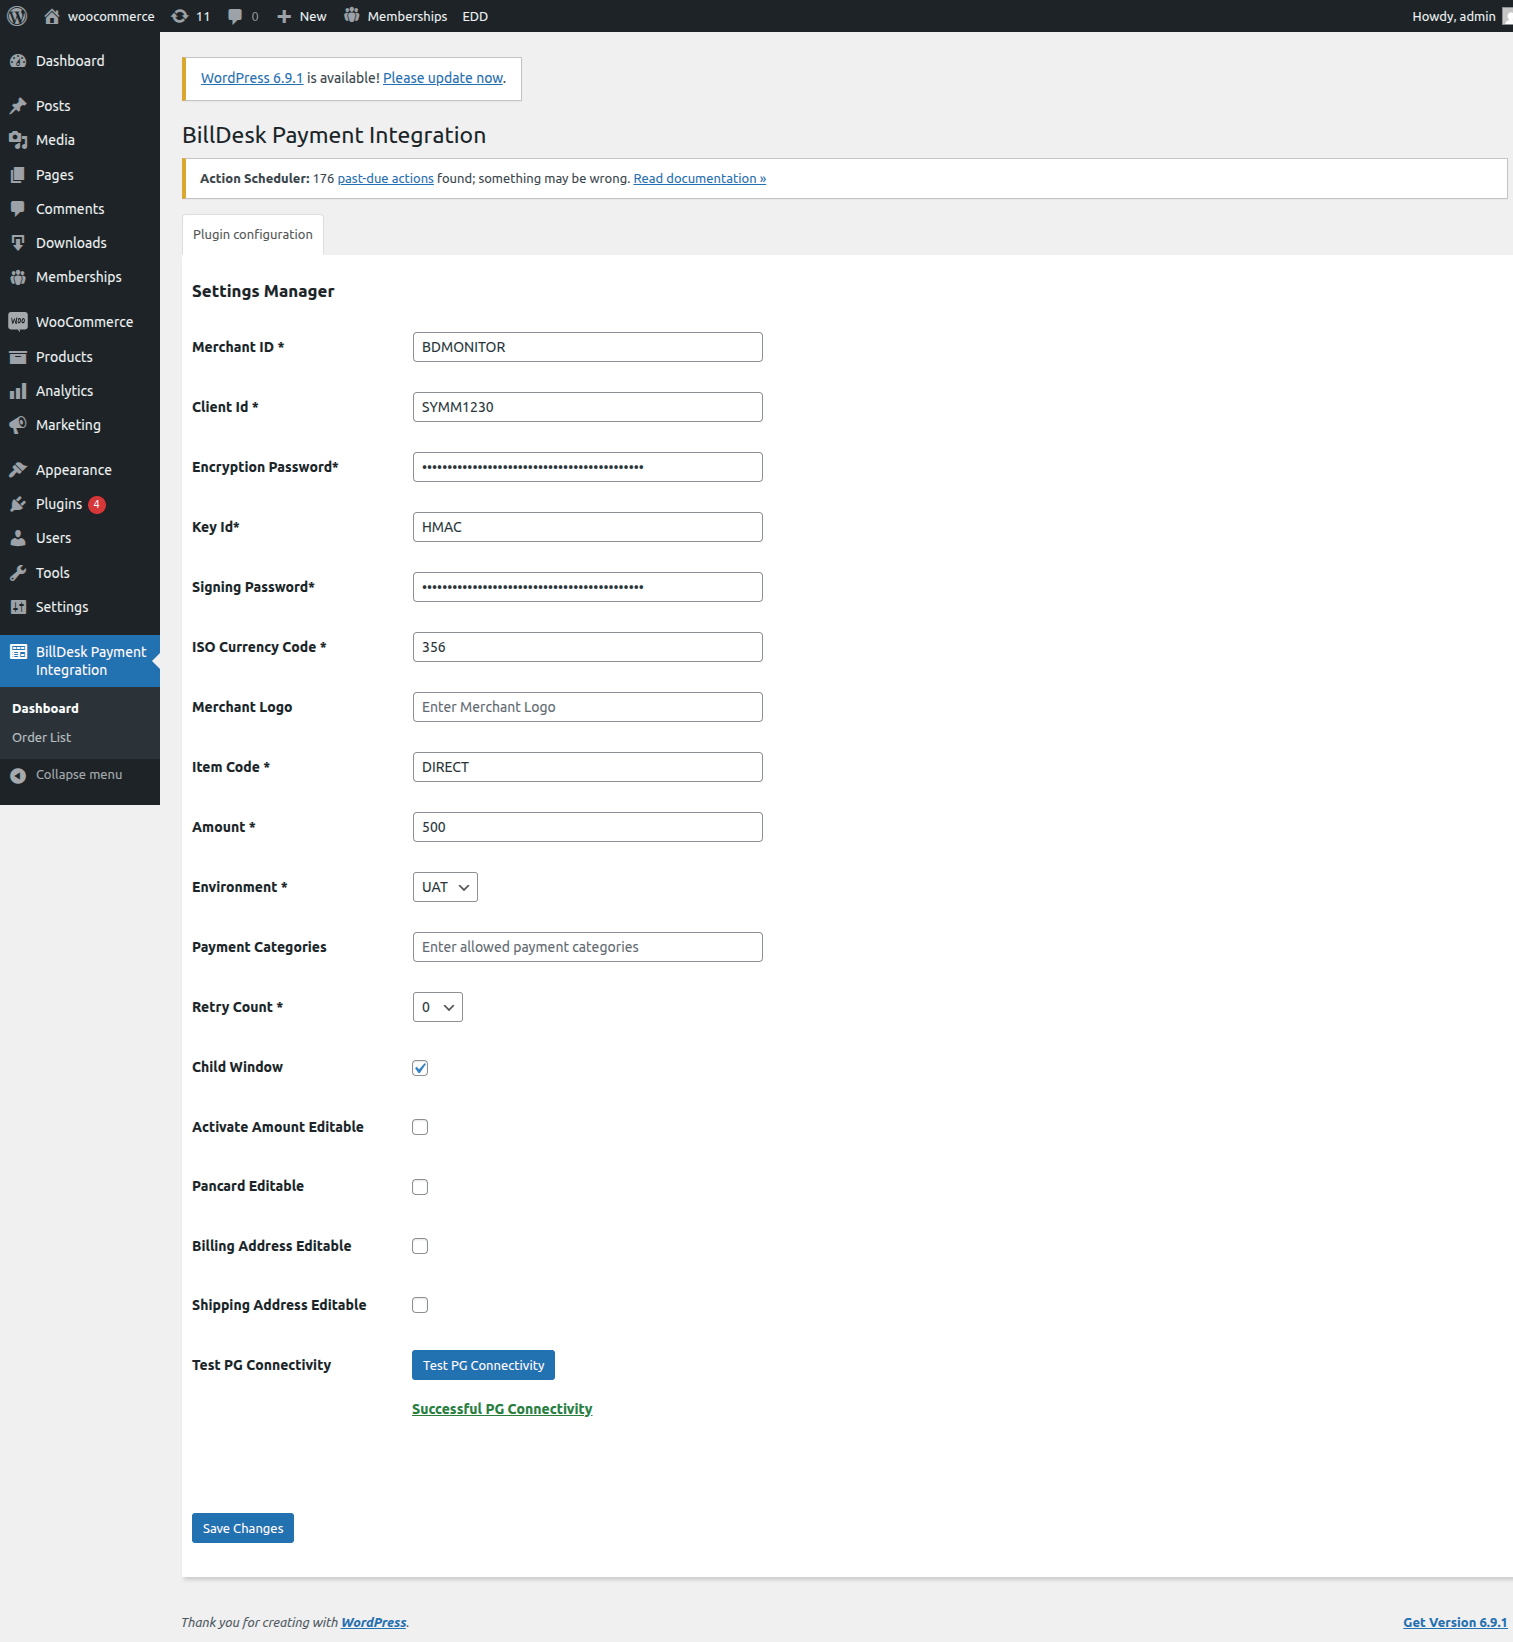
Click on BillDesk Payment Integration and add the merchant configuration details. The configuration page looks as below:
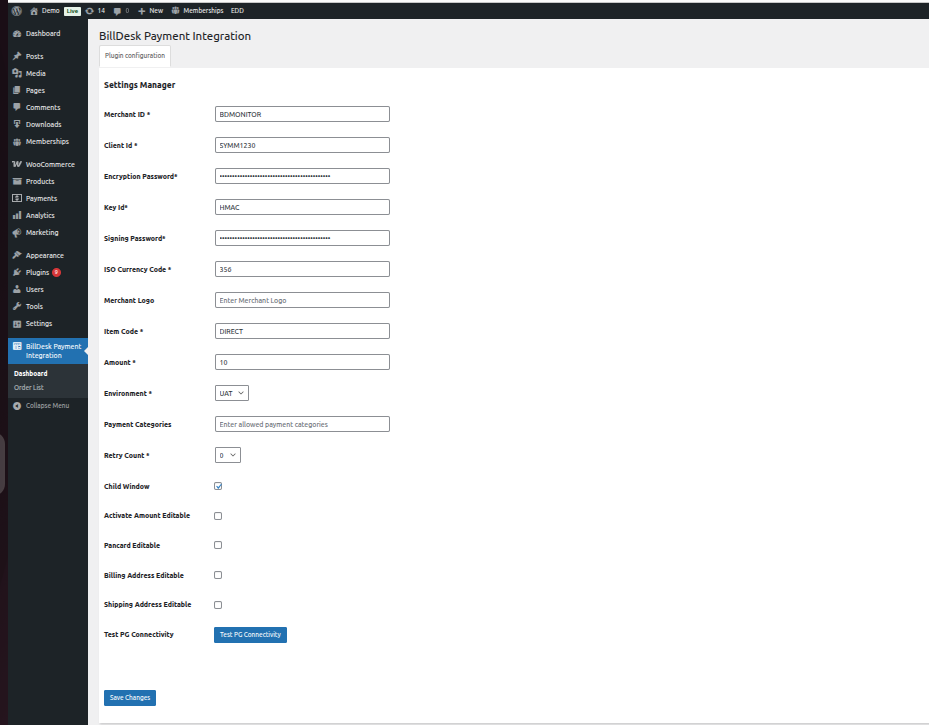
Ensure that the merchant has obtained the necessary details like Merchant ID, Merchant Key, etc. from BillDesk.
-
Merchant Id - string - This is the unique ID created by BillDesk to identify the merchant.
-
Client Id - string - A client ID shared by BillDesk for accessing the Payment Gateway APIs.
-
Key ID - string - The unique identifier of the public key shared by BillDesk
-
Encryption Password - string - An encryption key that is used to protect the communication with Payment Gateway APIs.
-
Signing Password - string - A signing key that is used to protect the communication with Payment Gateway APIs.
-
ISO Currency Code - string - Currency code (ISO 4217) for the currency to be used in the payment. For Indian Rupees use code 356.
-
Item Code - string - Item Code as shared by BillDesk team.
-
Amount - number - Default payment amount for all payments. The amount up to 2 decimal places precision is accepted.
-
Environment - string - Enables switching between the UAT or Production environments. Depending on this configuration, the plugin will connect to the UAT or production URLs.
-
Merchant Logo - string - A URL or Base64 encoded logo of the merchant that will be visible on the payment dialog.
- To convert image into Base64 encode image, use the following reference link - https://www.base64-image.de/
- Logo image does not have any specific requirements. Any image that is supported by browsers img tag can be used.
-
Payment Category - string - Merchant can configure Allowed Payment categories at the BillDesk backend. This ensures that only the configured payment categories enabled for the merchant will be displayed. However, this option also allows the merchant to override the payment category configuration.
For example, if a merchant wants to show cards as the only payment option, they can configure it using this setting. The merchant must mention all allowed payment methods as comma-separated values.
Note: Payment methods can have dynamic names. The valid payment category codes are as follows:
Allowed values: [card, emi, nb, upi, wallets, qr, gpay] -
Retry Count - number - Controls the number of payment re-attempts that should be allowed to users on failed payment.
-
Child Window - number - Enables or disables the child window.
- True/Enabled - If it is enabled, the modal opens the bank's page for processing in another window.
- False/Disable - If it is disabled, the modal redirects the merchant page to bank URLs for processing instead of opening them in another window.
-
Activate Amount Editable - Checking this option allows users to input their own amount. The users are presented with a text input for the amount which is pre-populated with the default amount configured above. The user can change the amount to any other amount and initiate payment. This option is more suitable for use cases like donation where the merchant would like the user to choose an amount.
-
PAN Editable - Checking this option allows users to input their own PAN.
-
Billing Address Editable - Checking this option allows users to input their own Billing Address.
-
Shipping Address Editable - Checking this option allows users to input their own Shipping Address.
-
TEST PG CONNECTIVITY - Confirm the successful configuration by clicking on 'Test PG Connectivity'. If the configuration was not successful, check Troubleshooting for error code analysis.
Click Save Changes.
SuccessAt this stage, the BillDesk extension is fully configured. Merchant can now accept payments via the BillDesk payment integration.
Features
Payment
Creating a Checkout Page
- In the sidebar, select Pages and create a page.
- Add related content to the merchant's site.
- Add the ShortCode billdesksdk_payment_checkout to the newly created page. The shortcode will be replaced with a checkout form when the merchant views the page.
WordPress Database
The plugin stores the order data in a <wordpress_table_prefix>bldsk_order table.
The table contains all the data captured at the time of the checkout. Additionally, the table maintains transaction related information received from the Payment Gateway.
The table also maintains a status column with following status types:
- PAYMENT_NOT_INITIATED- Initial status of the payment before the user has attempted to make a payment.
- PAYMENT_USER_CANCELLED - Status assigned when the user cancels the payment before making any attempt to pay.
- PAYMENT_SUCCESS - Status assigned when a payment is successful.
- PAYMENT_FAILURE - Status assigned when a payment has failed. The merchant can look at error_code and error_message columns to understand the underlying cause of the failure.
- PAYMENT_PENDING - Status assigned when a payment was initiated but is still pending to be completed.
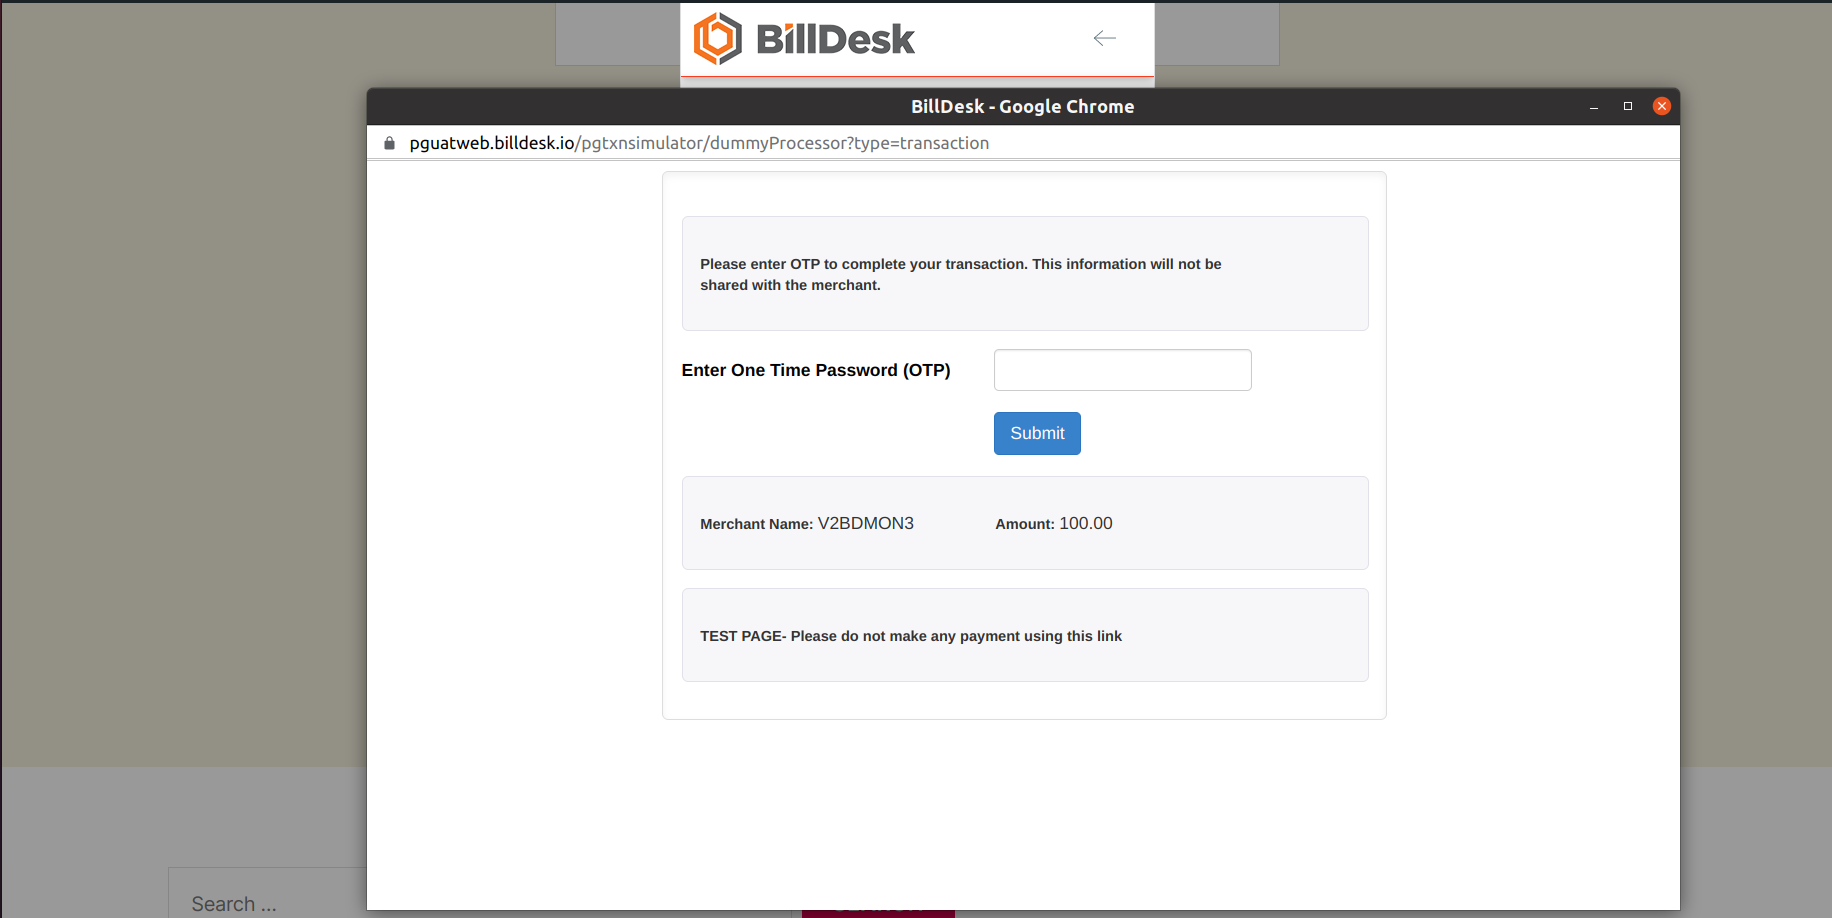
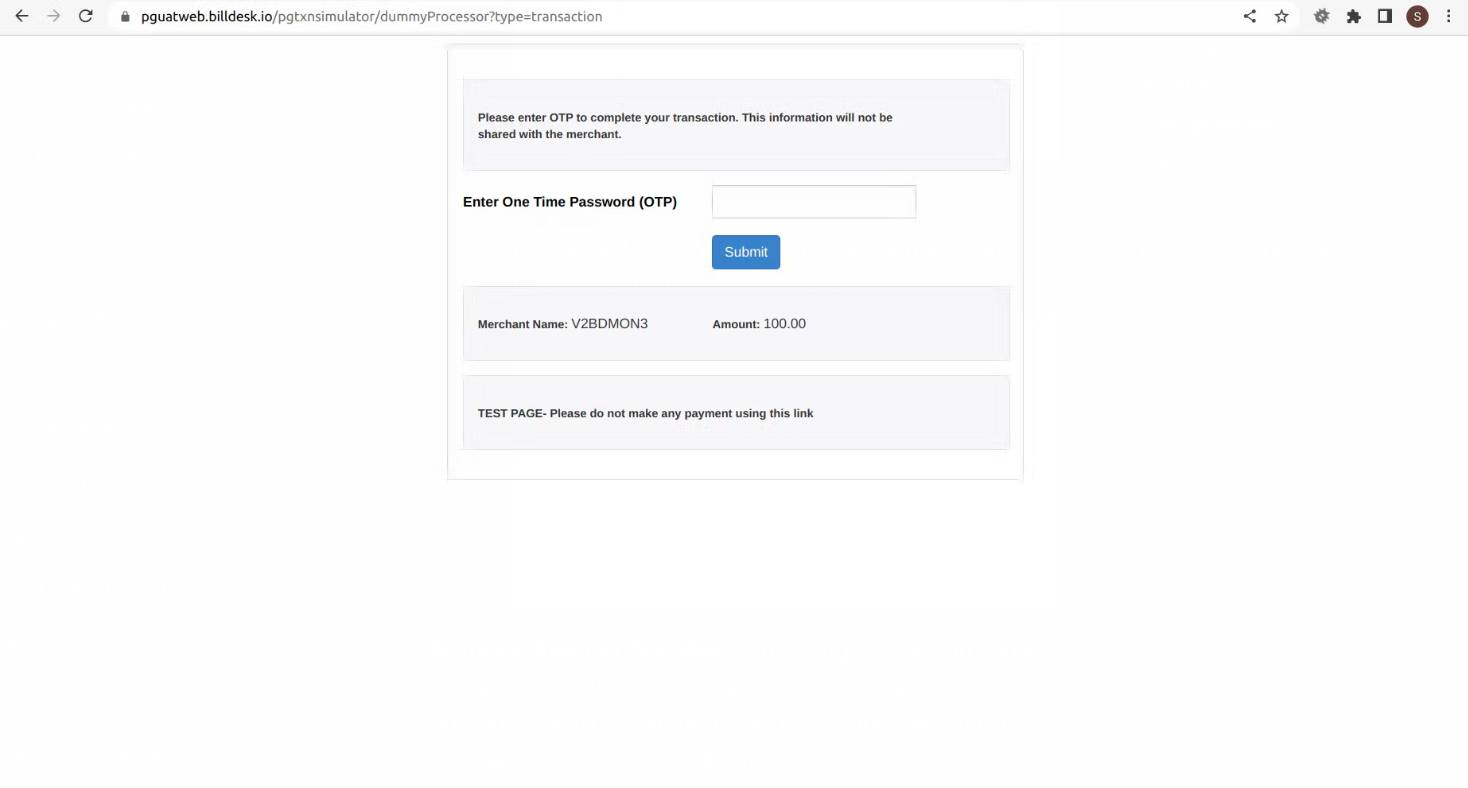
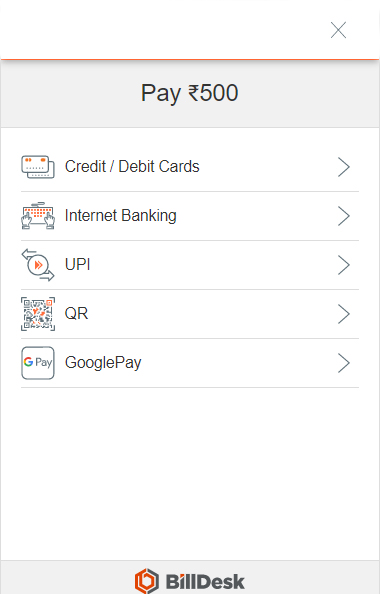
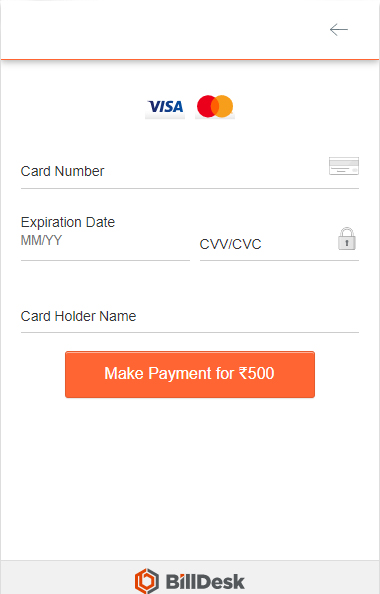
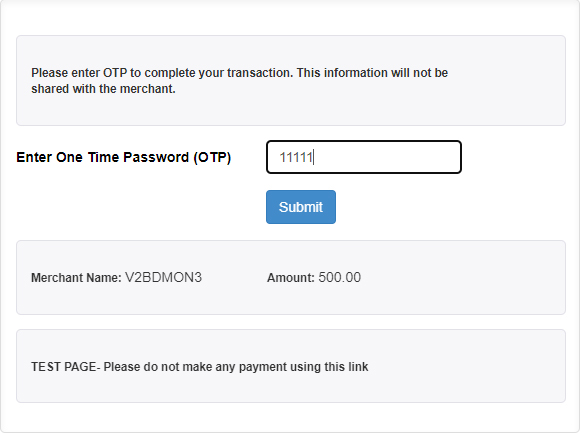
Make a Payment with BillDesk
The user flow is depicted in the screenshots below:
Refund
Select any transaction whose status is "SUCCESS" and click on Refund in the Order List.
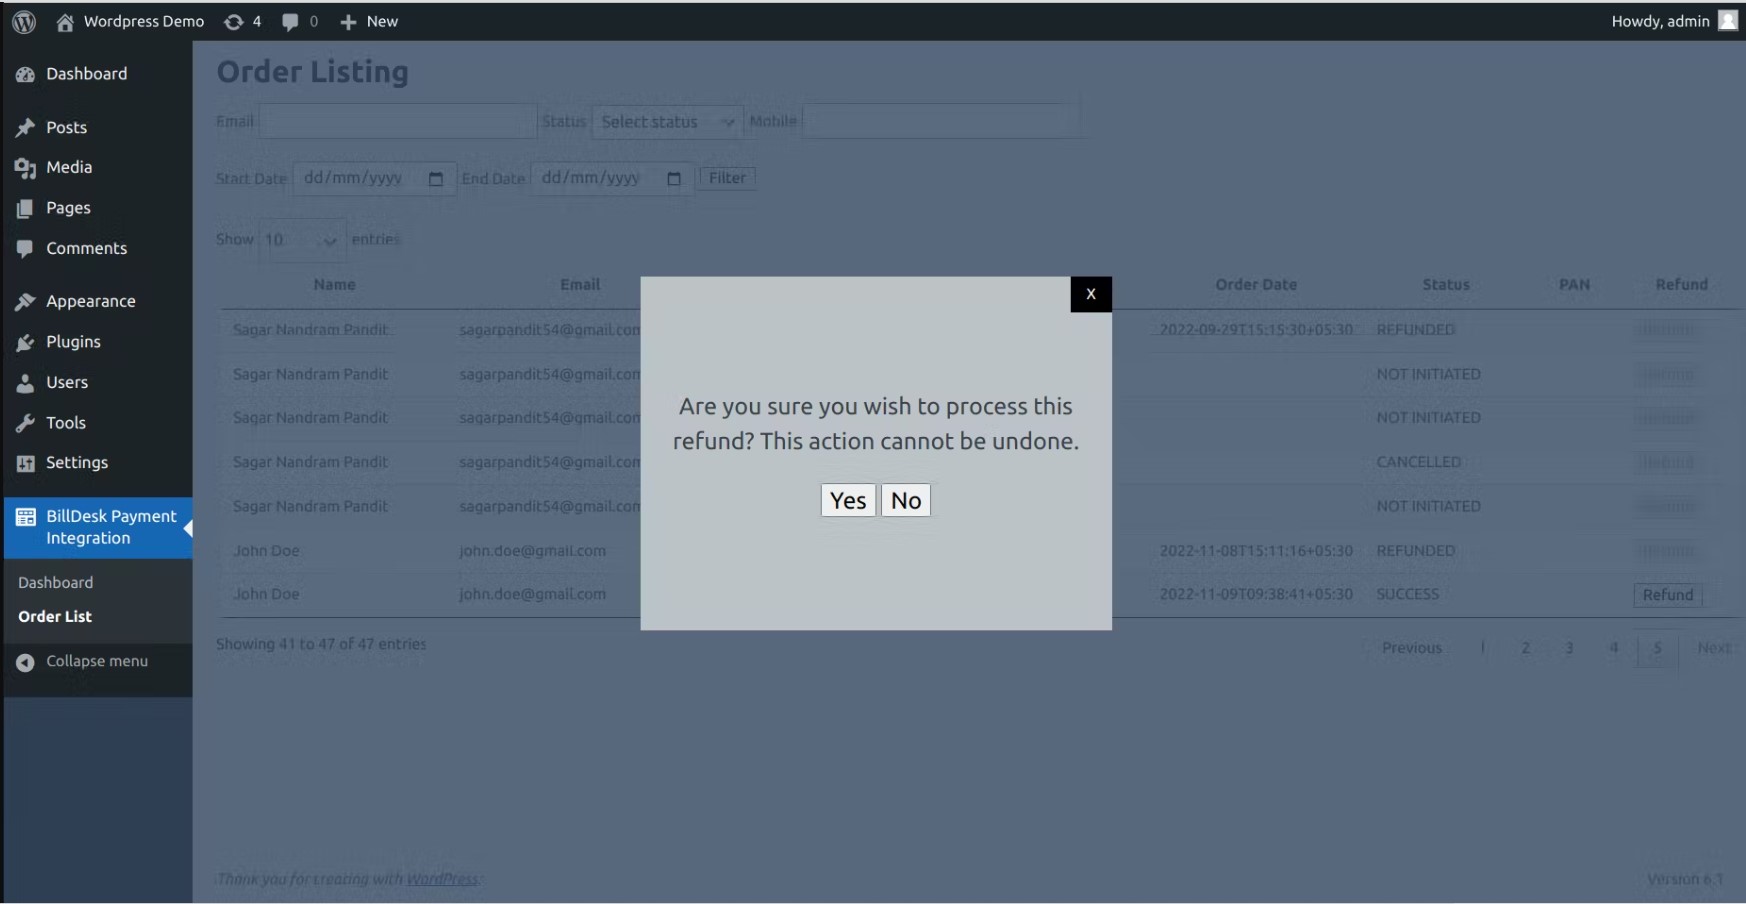
An alert box will appear. Click on Yes and the refund will be completed.

The plugin stores the order data in a <wordpress_table_prefix>bldsk_order table.
The table contains all the data captured at the time of the checkout. Additionally, the table maintains transaction-related information received from the Payment Gateway.
The table also maintains a status column with the following different statuses-
- PAYMENT_NOT_INITIATED - This is the initial status of the payment before the user has even attempted to make a payment.
- PAYMENT_USER_CANCELLED - In case the user cancels the payment without making any attempt to pay, this will be the status of the order.
- PAYMENT_SUCCESS - This status represents that the payment was successful.
- PAYMENT_FAILURE - This status represents that the payment failed. The merchant can look at error_code and error_message columns to understand the underlying cause of the failure.
- PAYMENT_PENDING - This status represents that Payment Gateway states that this payment was initiated but is still pending.
Order Listing
Admin can view the merchant's order details by going to BillDesk Payment Integration → Order Listing.
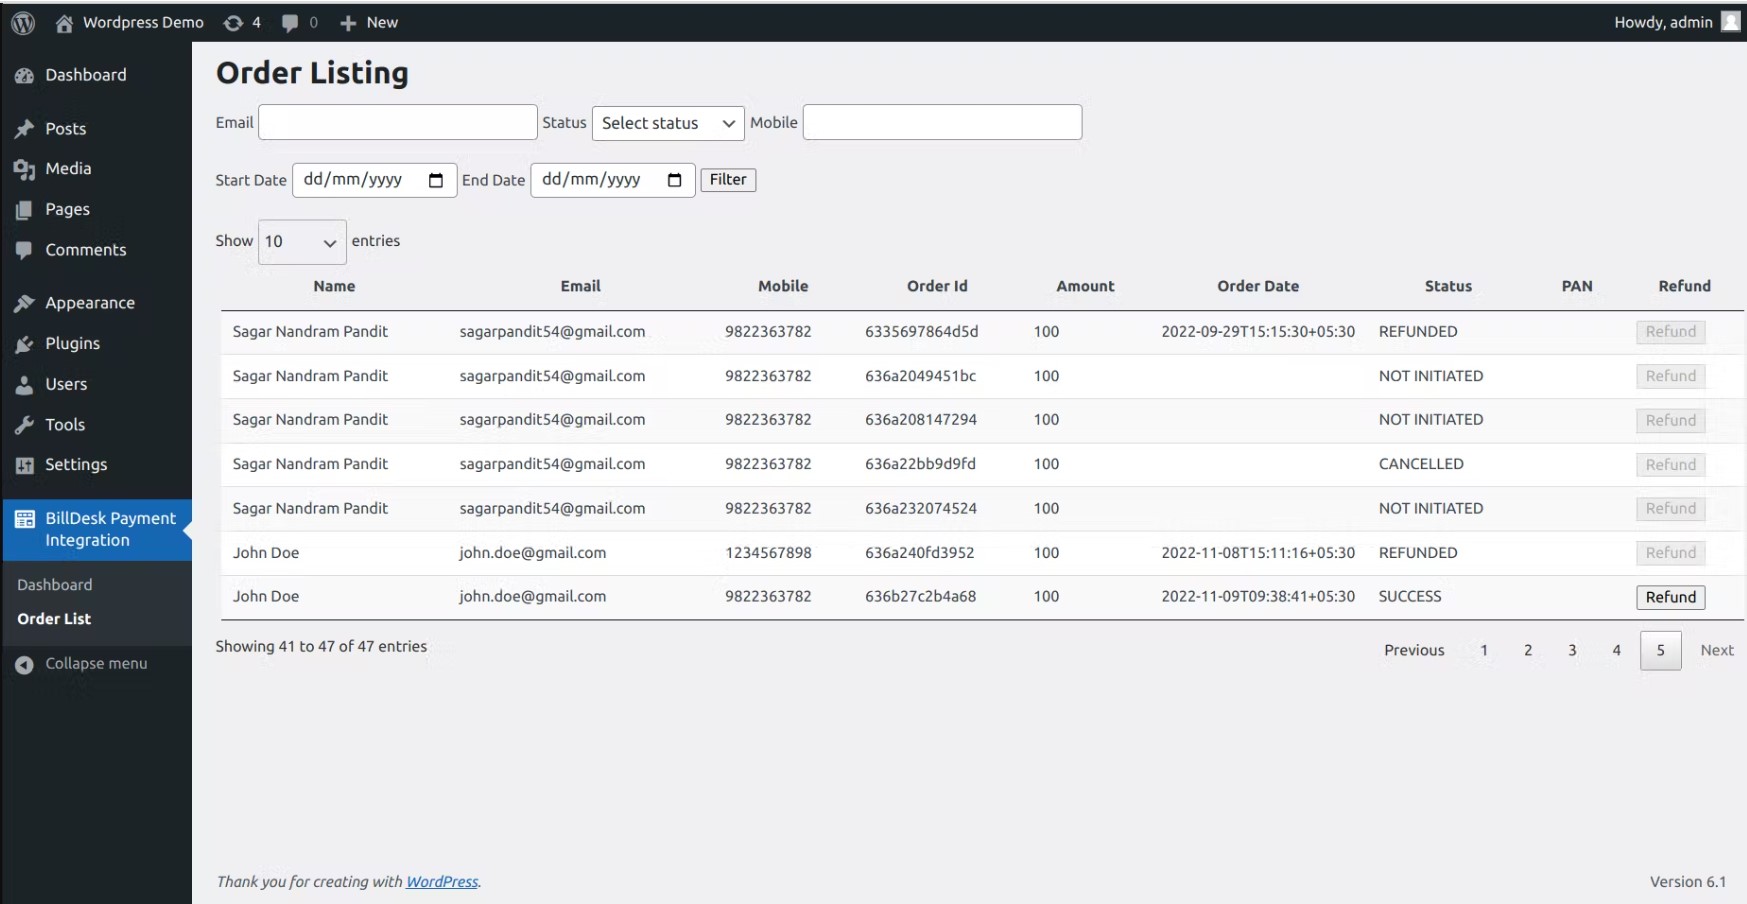
NoteMerchant will get detailed information about the transactions and their current status.
Troubleshooting
For WordPress, logs can be viewed at logs/wordpress_billdesk_yyyy-mm-dd.log, where the merchant can check the reason of failure.
To confirm that PG connection is established, go to the Configuration page and click on TEST PG CONNECTIVITY.
Case 1: PG connectivity is successful.
Case 2: PG connectivity is unsuccessful.
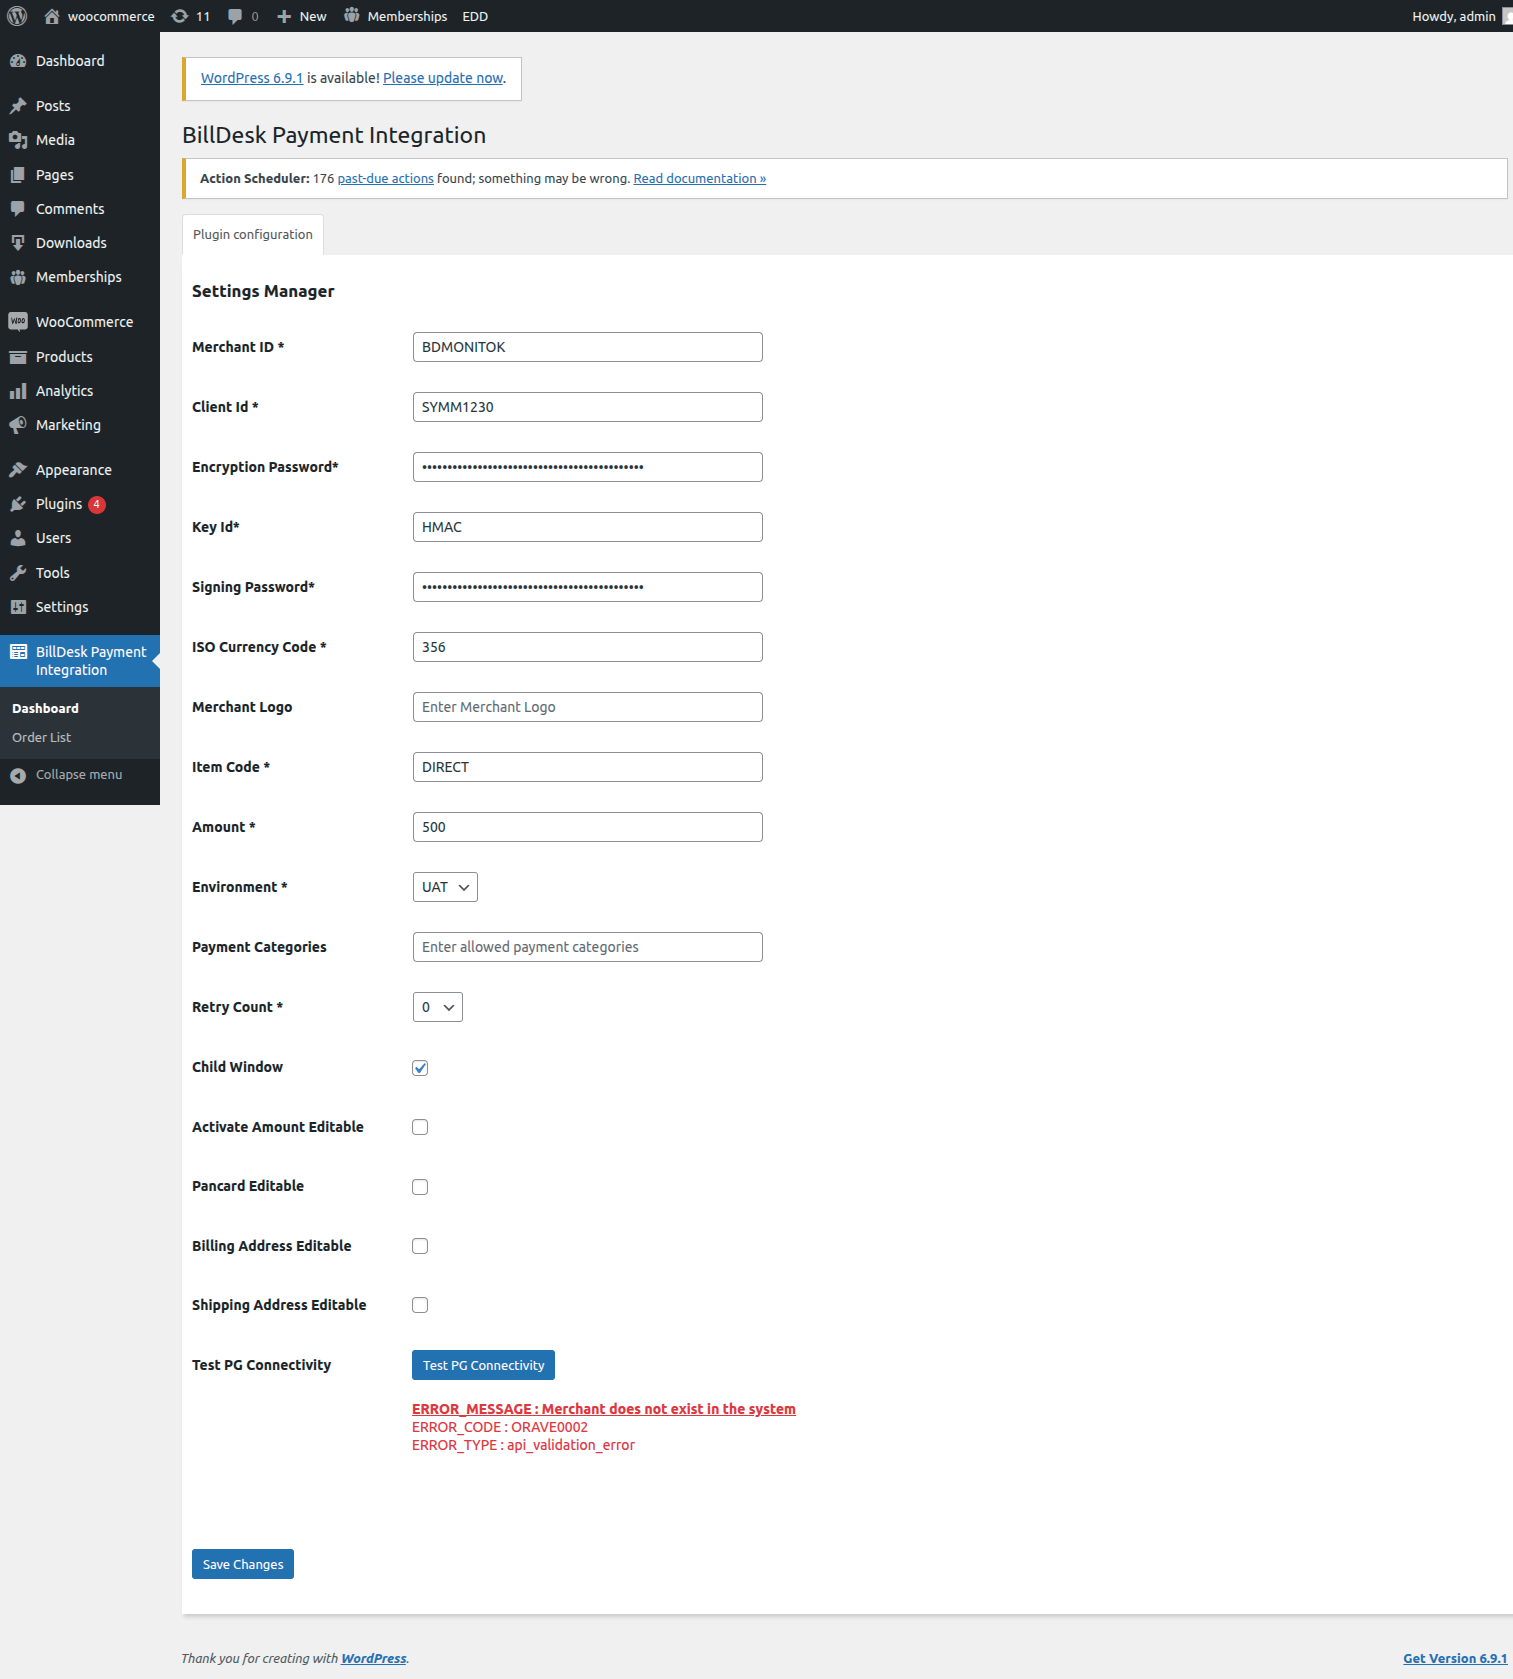
If an error occurs during the connection, please refer to the following table:
| Error Code | Error Type | Error Description |
|---|---|---|
| GNAUE0006 | authentication_error | Request from unauthorized IP. |
| ORIRE0001 | invalid_request_error | Required parameter Merchant ID is missing. |