VirtueMart
Introduction
VirtueMart helps merchants set up a new user-friendly store in minutes. Add the BillDesk VirtueMart plugin to seamlessly start accepting payments through this store.
Merchant can download the plugin with the following link.
Prerequisites
Ensure that the merchant has downloaded, installed, and configured:
- PHP v8.1 and higher and MYQSL v8.1 and higher
- Joomla v4.0.4 stable framework
- VirtueMart v4.4 as a component of Joomla
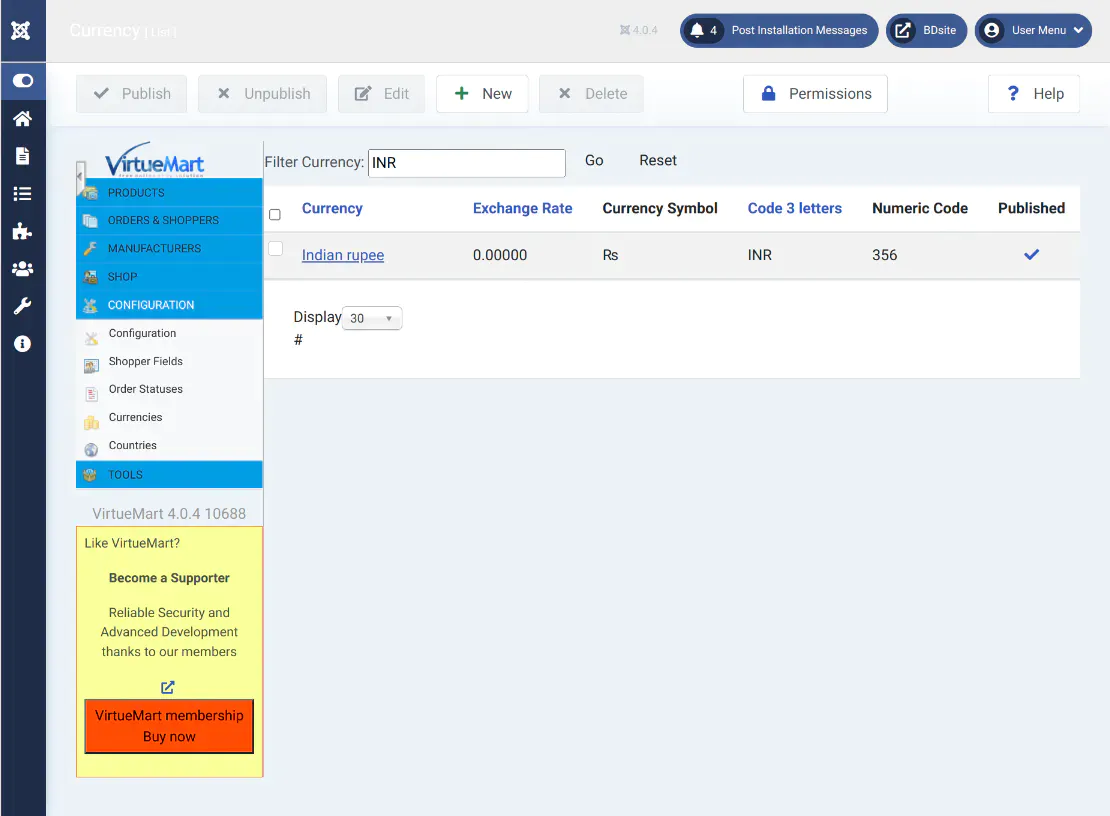
- Dependency: Navigate to Components → VirtueMart → Currencies and enable Indian rupee.
Integration Steps
Installation
Follow the steps below to install and activate the BillDesk VirtueMart plugin.
Installation
- Download the plugin from the Plugin Directory.
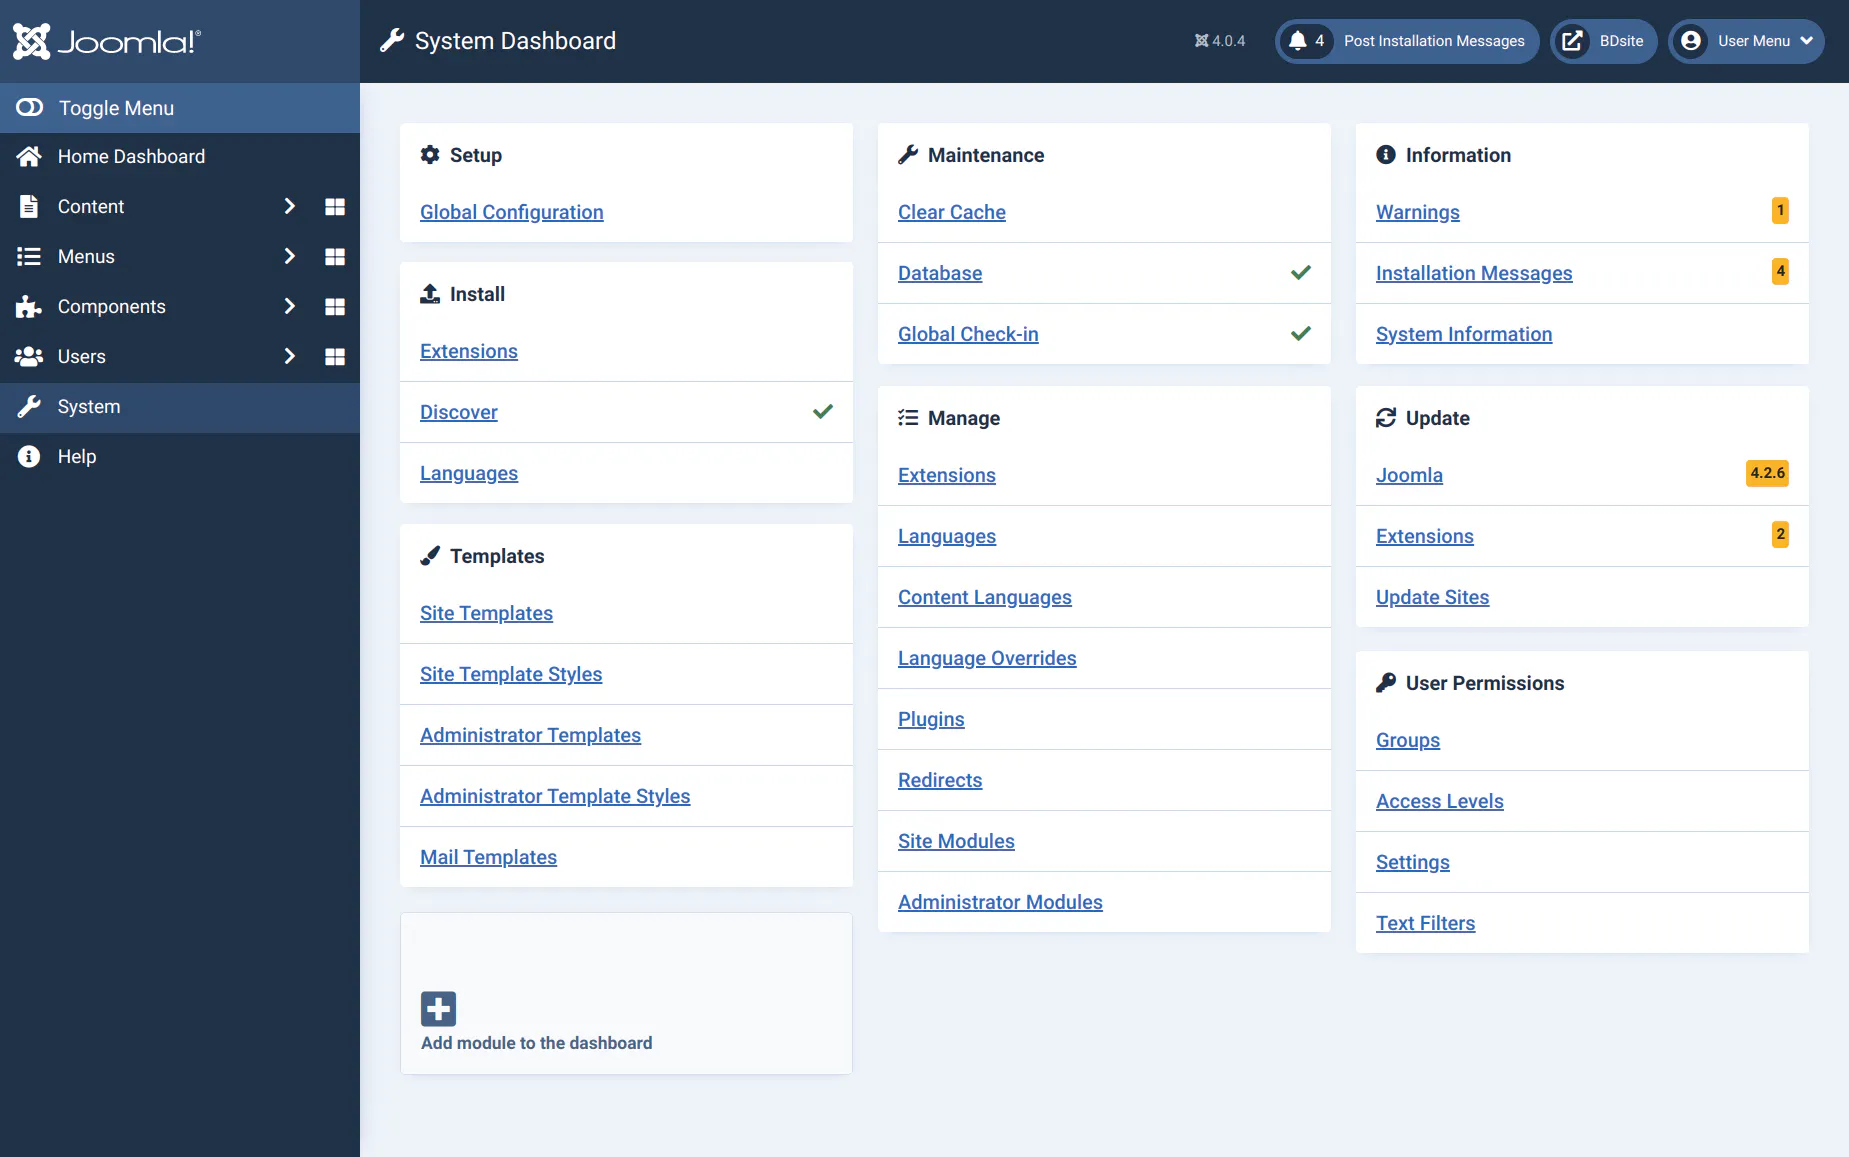
- Open the merchant's Joomla site and navigate to System → Install.
- Click on Extensions.
- Upload the file 'virtuemart-billdesk-plugin.zip'.

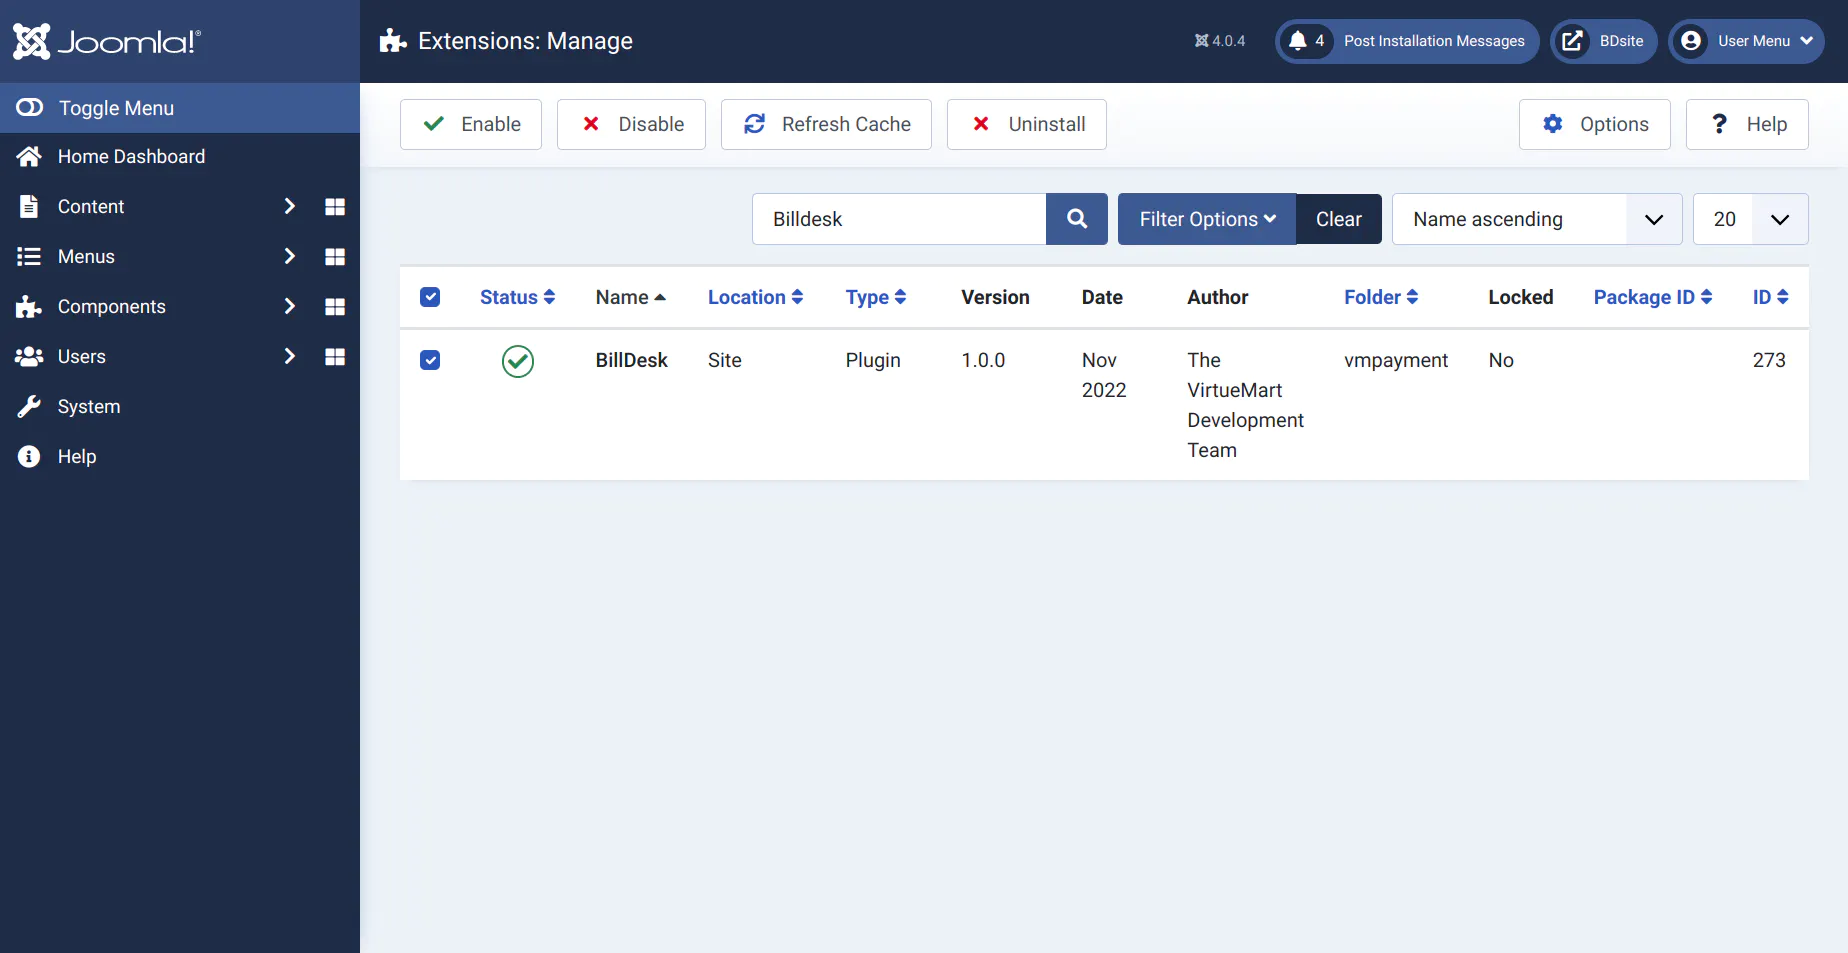
- Enable BillDesk payment integration by navigating to System → Manage.
- Click on Extensions.
- Select BillDesk payment integration and click on the Enable button.
Configuration
After the plugin is activated, the merchant will need to configure the plugin to start accepting payments via BillDesk.
- Click on Components→ VirtueMart→ Payment Methods.
- Click on the New button.
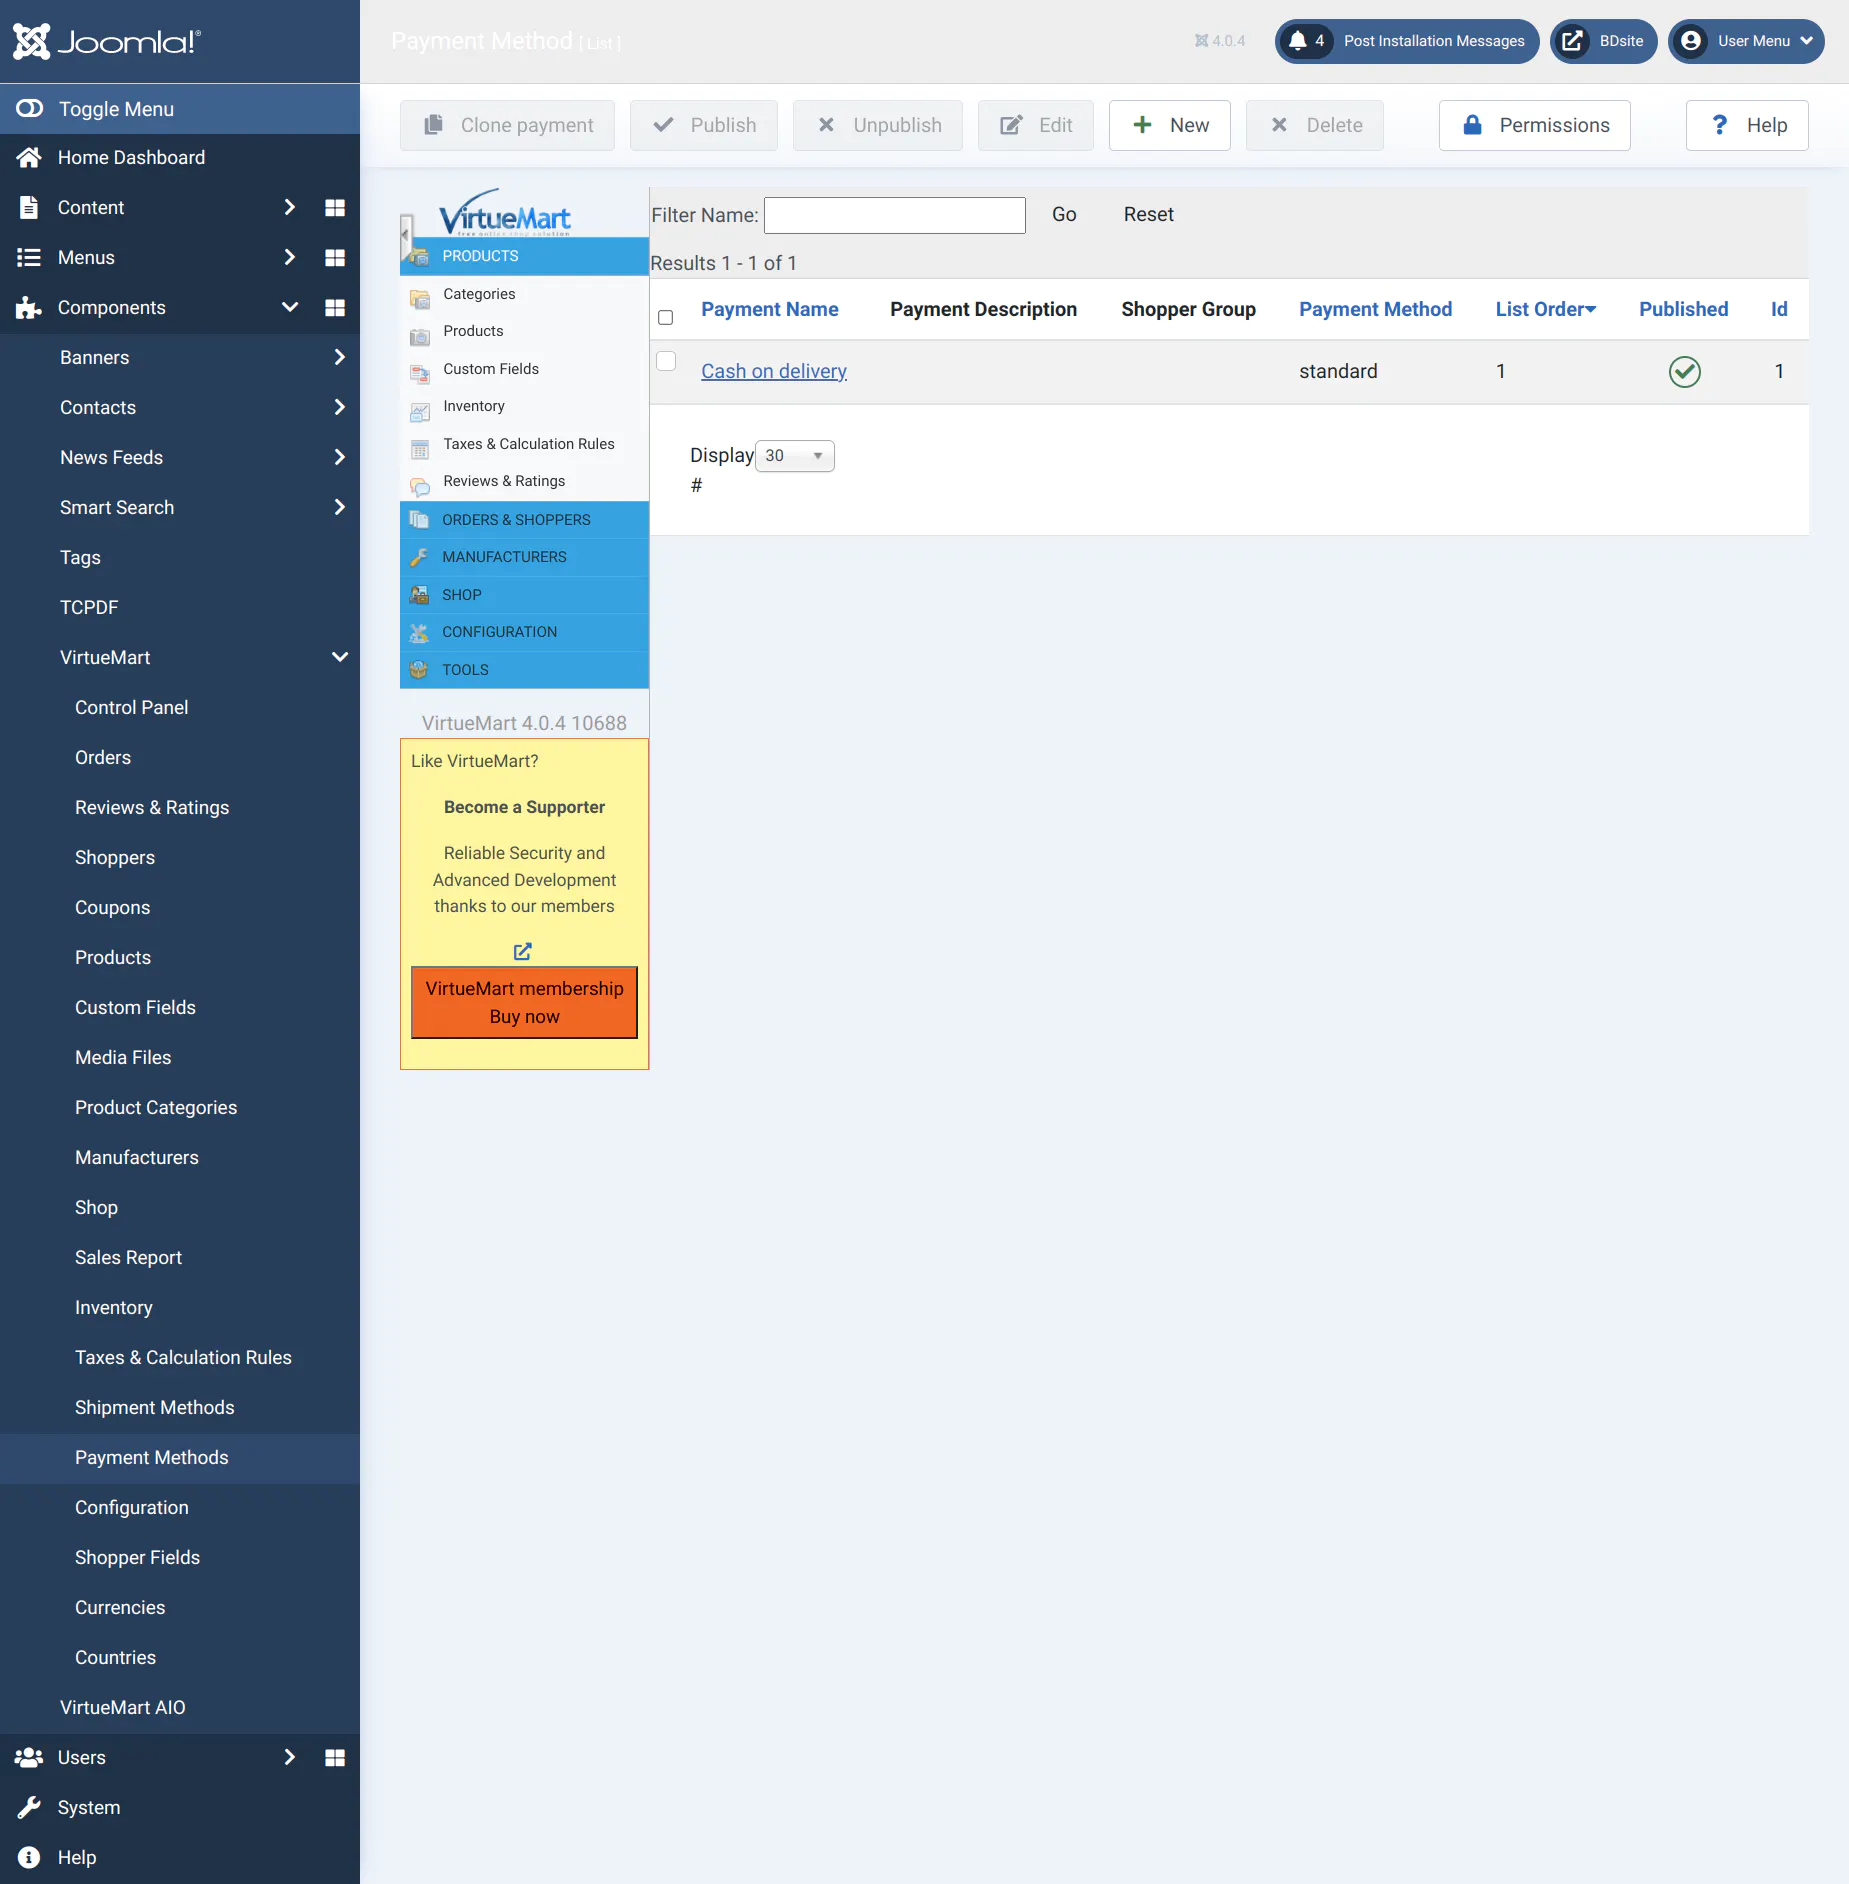
- Payment Name - BillDesk
- Sef Alias - BillDesk
- Published - Yes
- Payment Description - Add descriptions for applicable “Payment Methods”.
- Payment Method - Select BillDesk as a payment method from dropdown list.
- Shopper Group - Available for all
- List Order - Payment method order position on payment page (Integer value).
- Currency - Indian rupee
- Click on Save button to save payment method information.
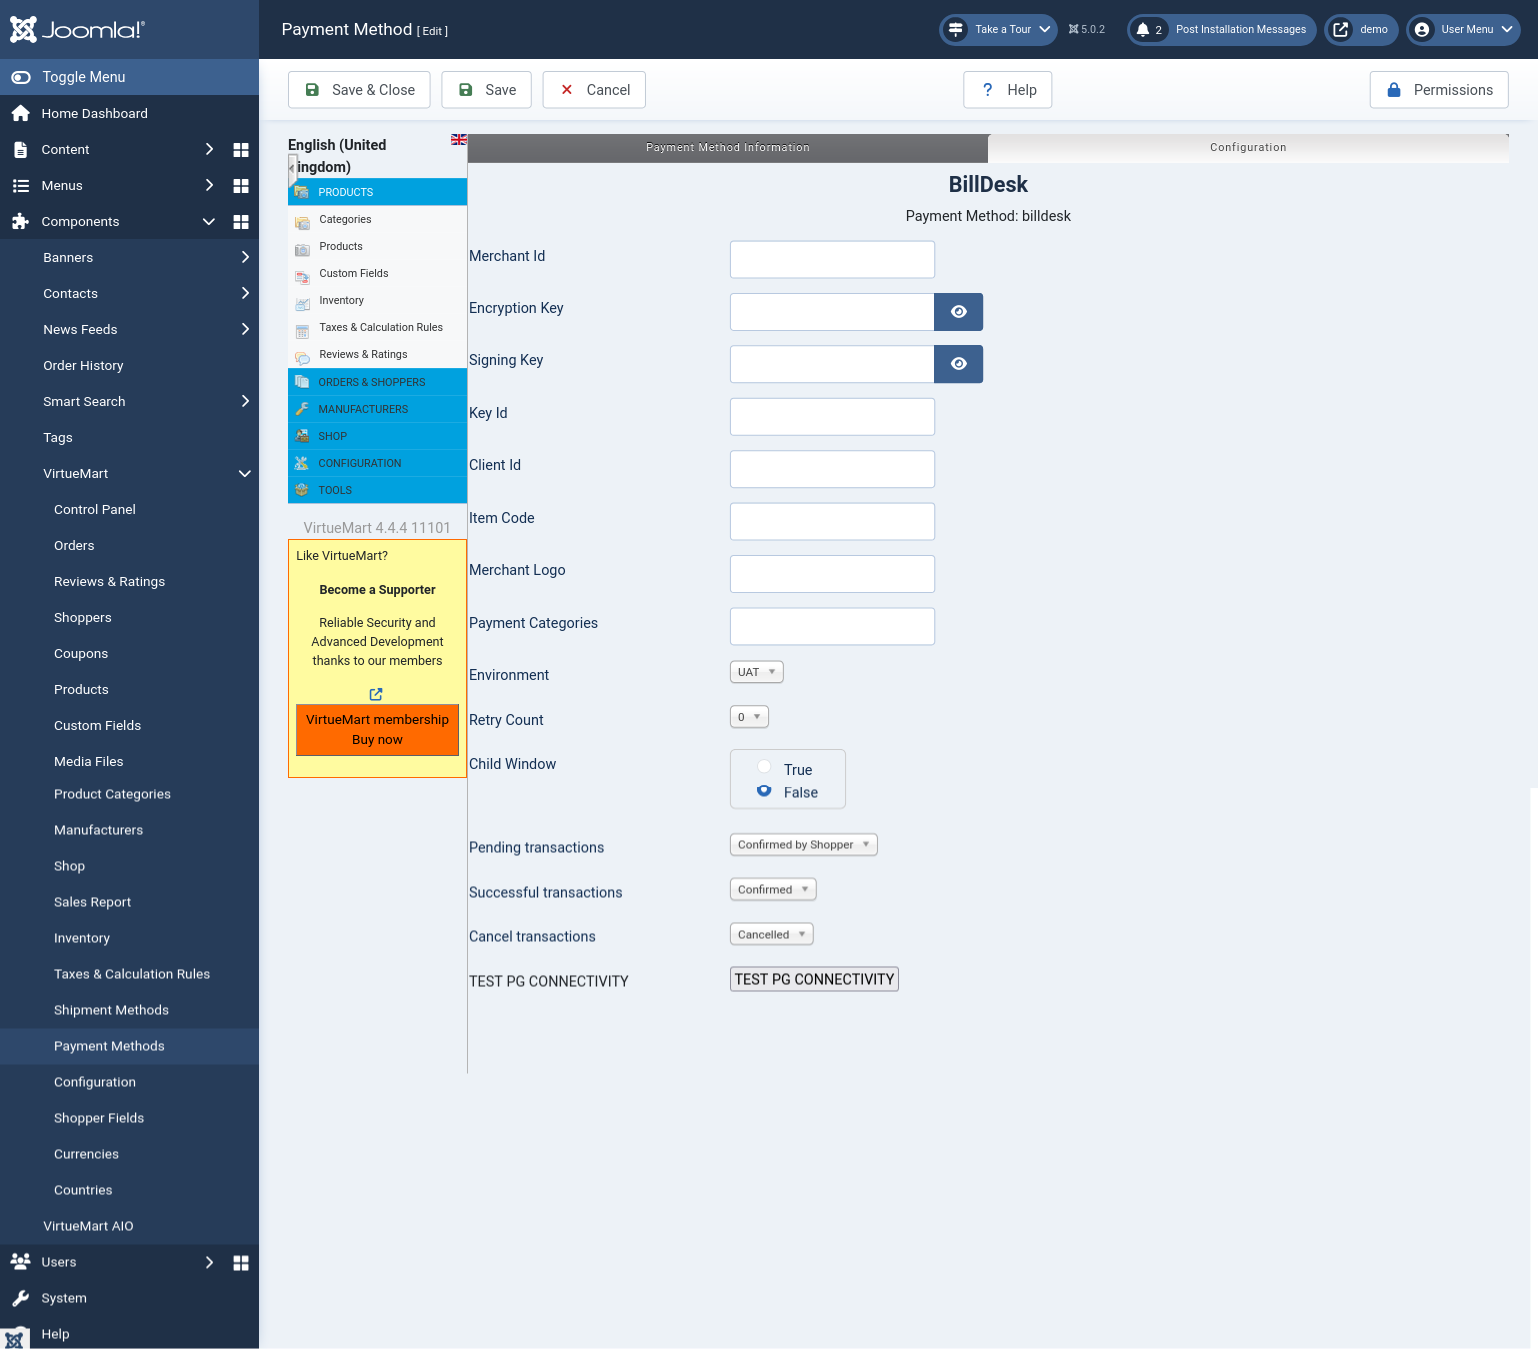
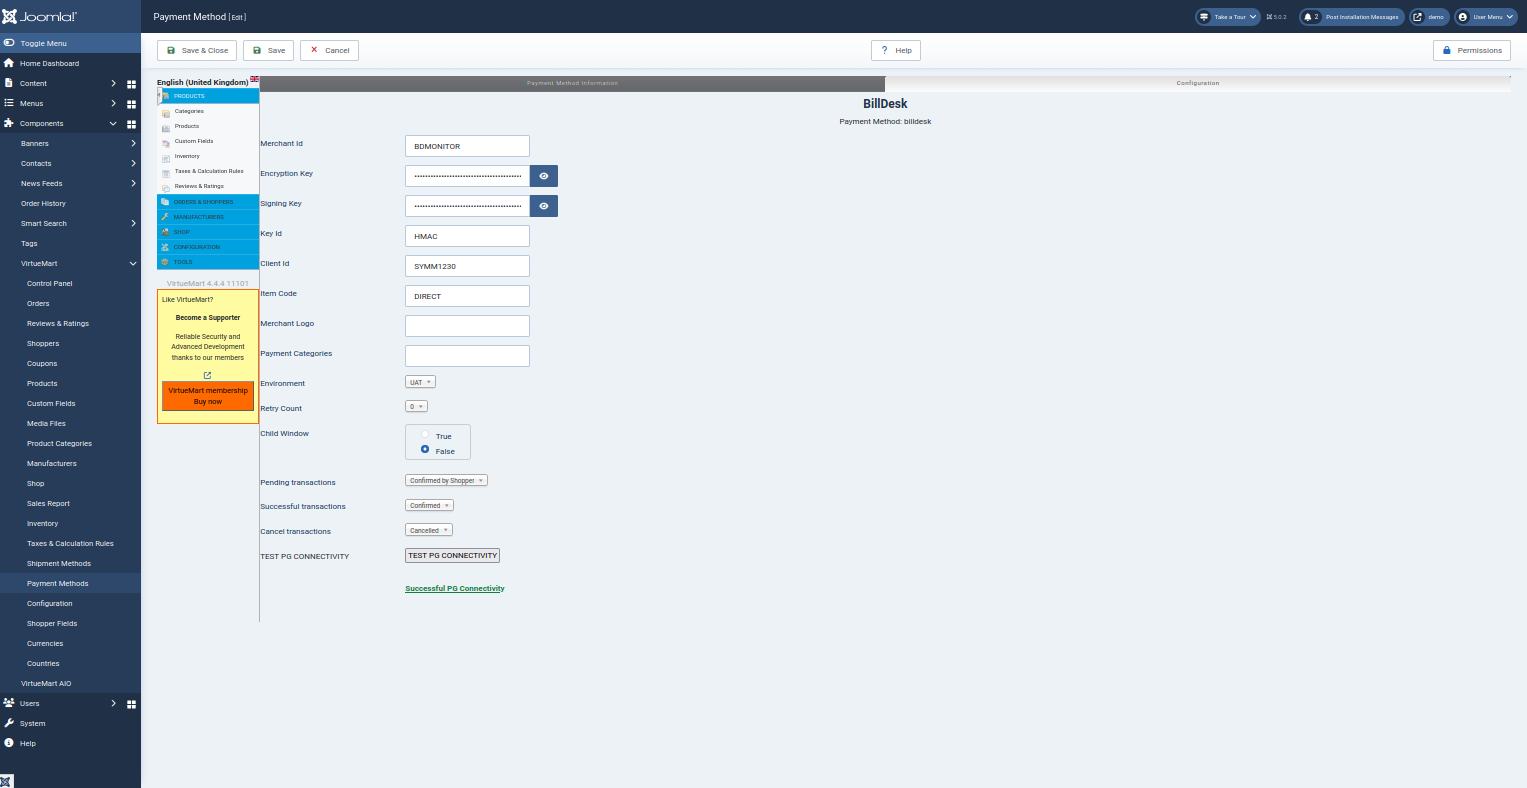
- Click on Configuration.
- Go to Configuration section to enter BillDesk payment integration details.
- Click on Save & Close button.
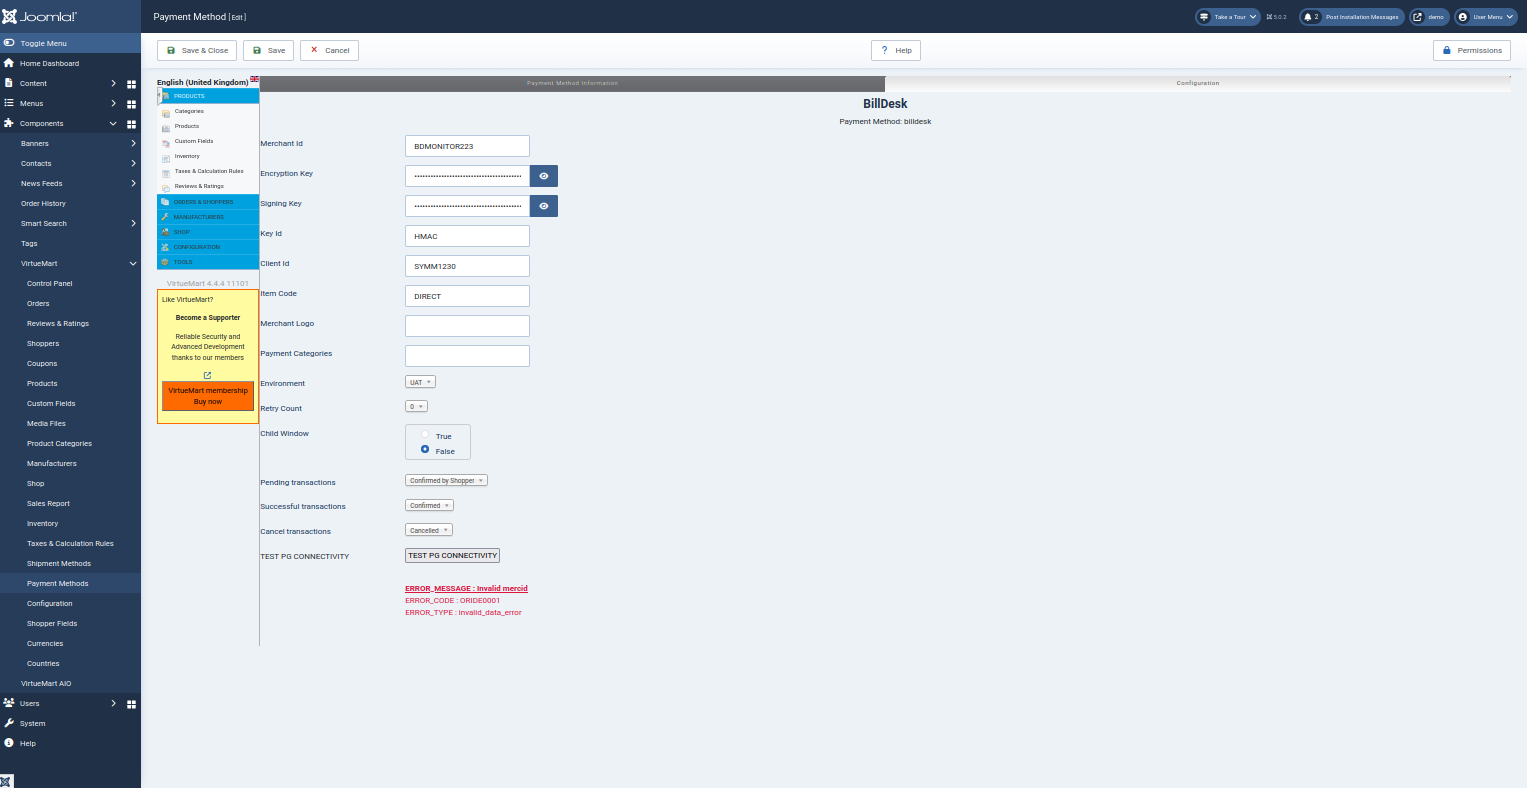
Note: Ensure that the merchant has obtained the necessary details like Merchant ID, Merchant Key, etc. from BillDesk.
-
Merchant Id - string - This is the unique ID created by BillDesk to identify the merchant.
-
Encryption Key - string - An encryption key that is used to protect the communication with Payment Gateway APIs.
-
Signing Key - string - A signing key that is used to protect the communication with Payment Gateway APIs.
-
Key ID - string - The unique identifier of the public key shared by BillDesk
-
Client Id - string - A client ID shared by BillDesk for accessing the Payment Gateway APIs.
-
Merchant Logo - string - A URL or Base64 encoded logo of the merchant that will be visible on the payment dialog.
-
Item Code - string - Item Code as shared by BillDesk team.
-
Environment - string - Enables switching between the UAT or Production environments. Depending on this configuration, the plugin will connect to the UAT or production URLs.
-
Payment Category - string - This option allows to configure payment categories. Suppose if a merchant only wants to show cards as a payment option, then it can be controlled using this configuration. All allowed payment methods need to be mentioned separated by a comma. Note that since the payment methods name can be dynamic, there is no validation for this input at this moment. Valid payment category code are as follows:
- card - Credit/Debit Card
- emi - EMI
- nb - Netbanking
- upi - UPI
- wallets - Wallets
- qr - QR Code
- gpay - Google Pay
-
Retry Count - number - Controls the number of payment re-attempts that should be allowed to users on failed payment.
-
Child Window - number - Modal redirects the merchant page to bank URLs for processing the payment. “Child window” parameter gives an option to control the window in which OTP 2FA (two factor authentication) screen will open.
- True - In this case, the new window will open for OTP 2FA screen.
- False - In this case, the OTP 2FA screen will open in the same window.
-
Pending transaction - Set as Confirmed by Shipper.
-
Successful transaction - Set as Confirmed.
-
Cancel transaction - Set as Cancelled.
-
TEST PG CONNECTIVITY - Confirm the successful configuration by clicking on 'Test PG Connectivity'. If the configuration was not successful, check Troubleshooting for error code analysis.
SuccessAt this stage, the BillDesk extension is fully configured. Merchant can now accept payments via the BillDesk payment integration.
Features
Payment
To make a successful transaction
- Go to Your Store.
- Add the product(s) to the shopping cart and proceed to checkout to complete the purchase.
- Select BillDesk as a Payment Method.
Note: CASSIOPEIA is the default template for VirtueMart.

- Accept the Terms of Service to continue.
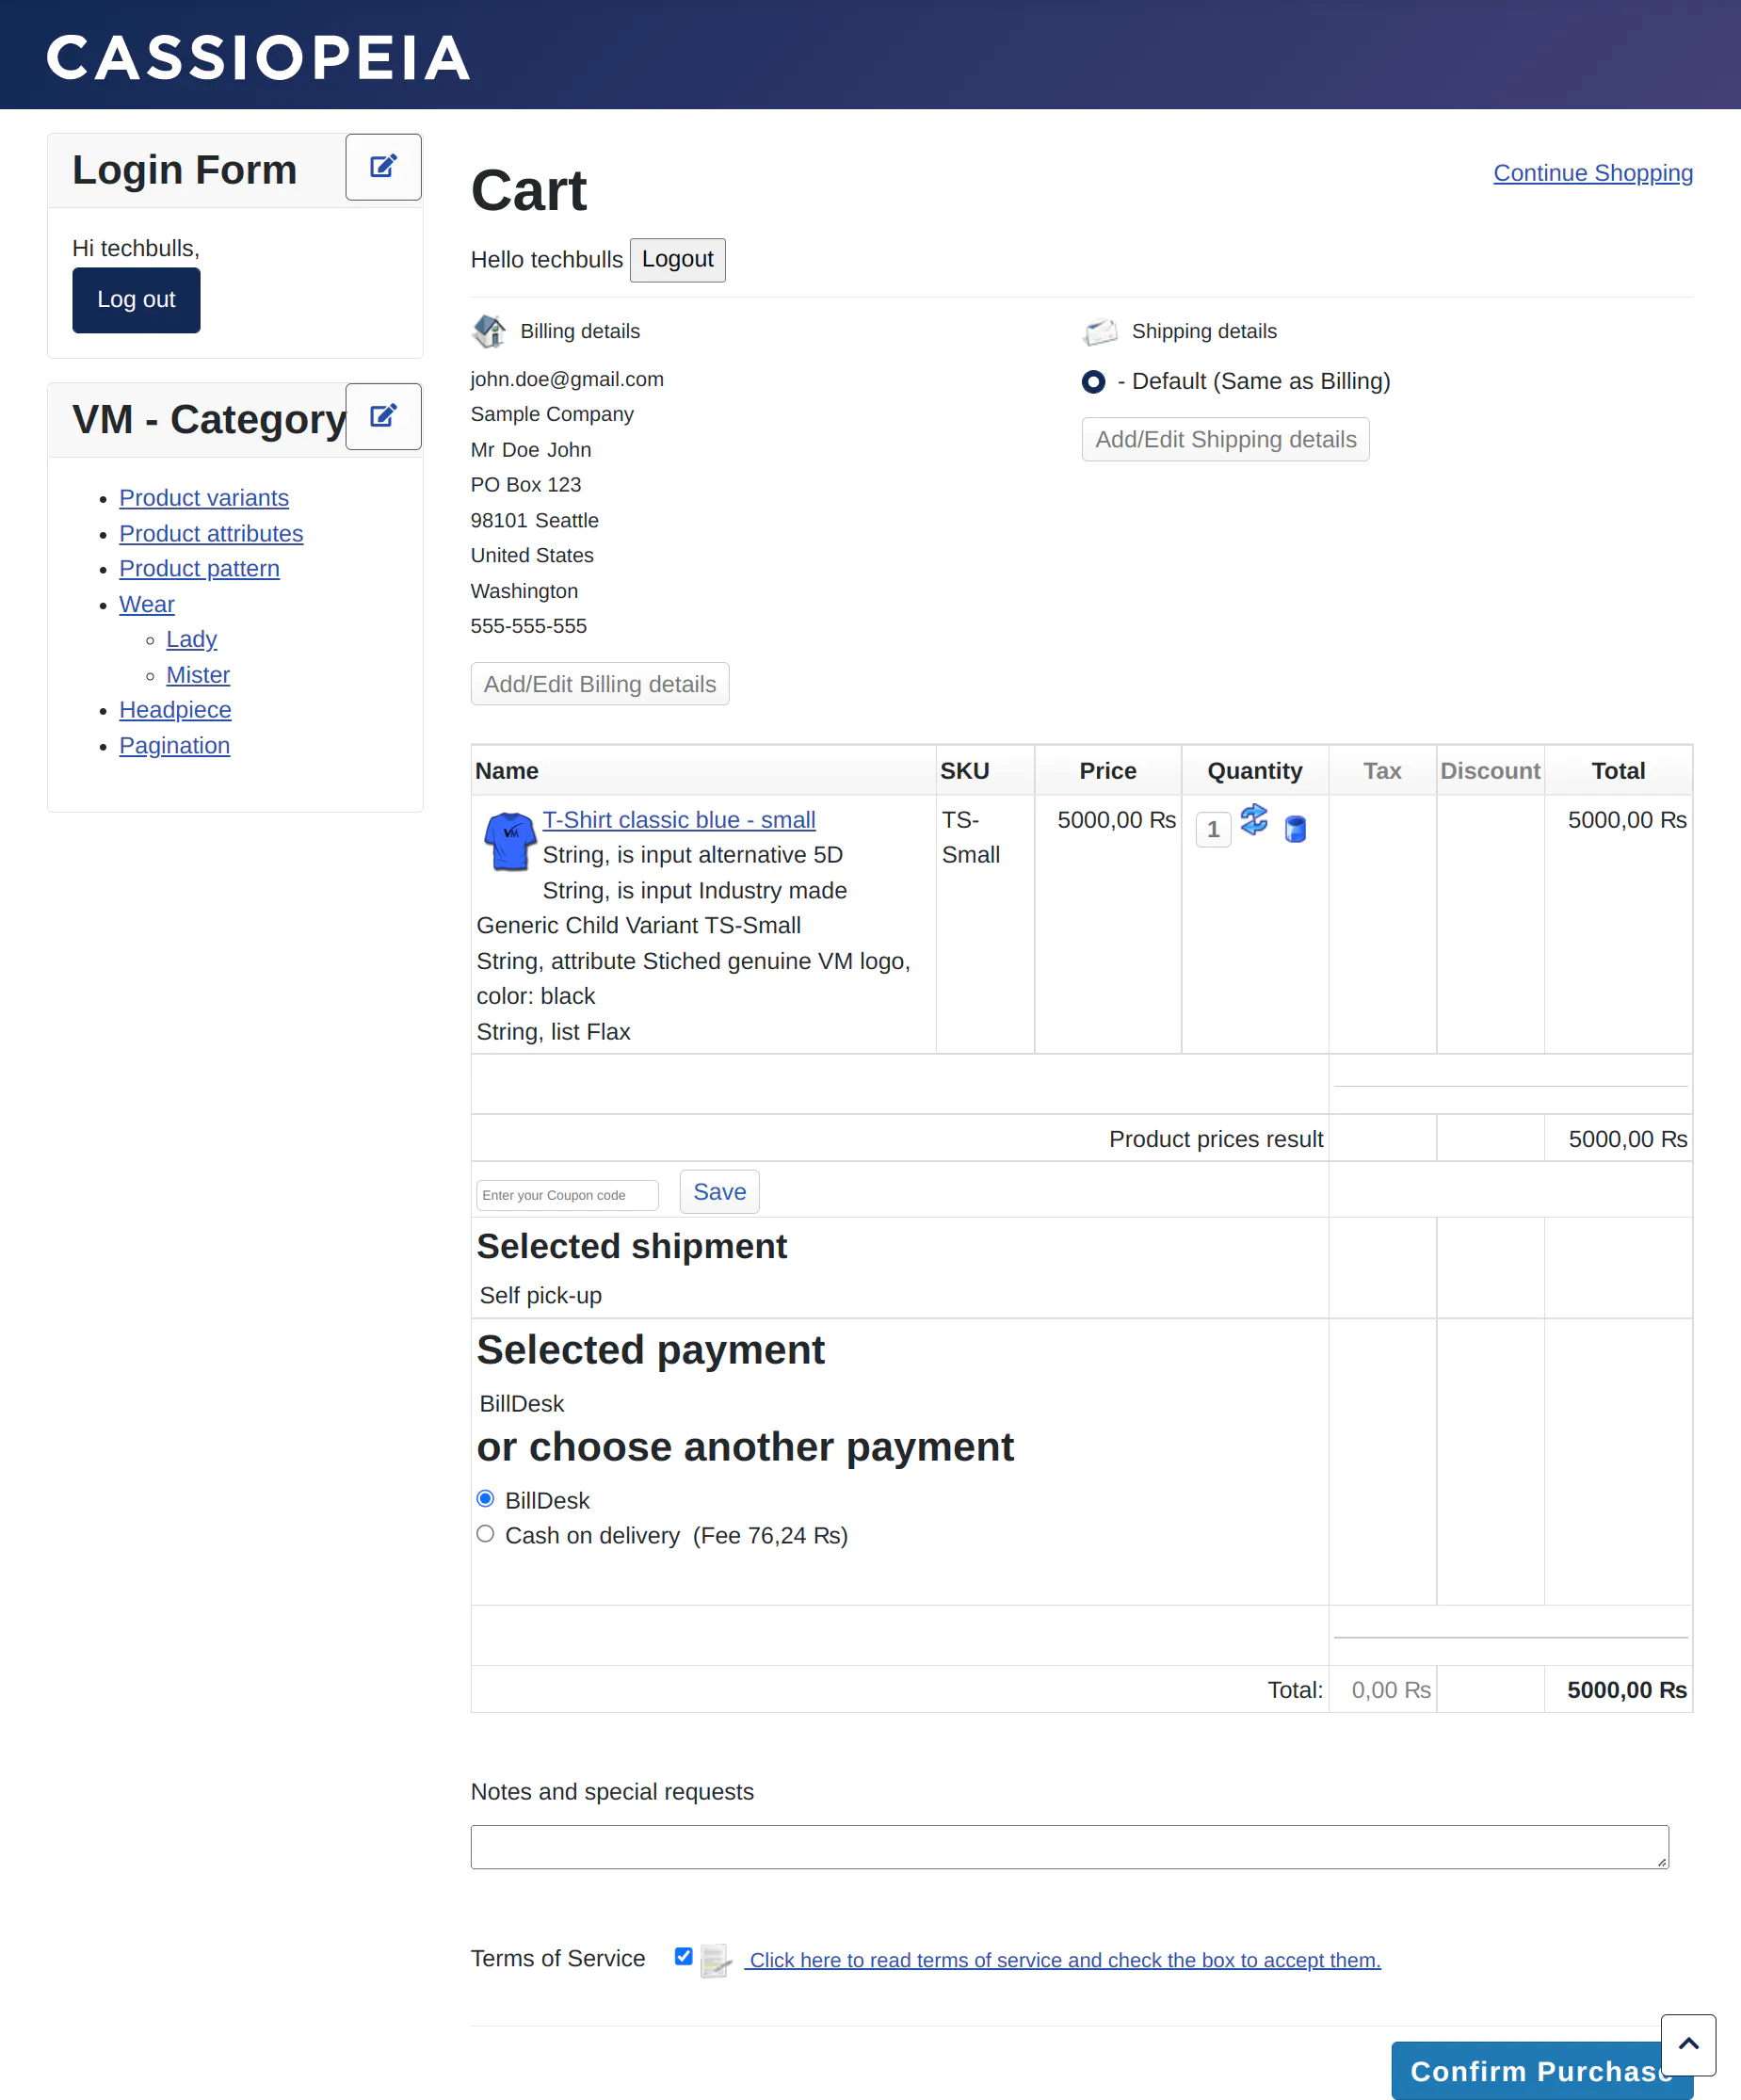
- Click on the Confirm Purchase button.
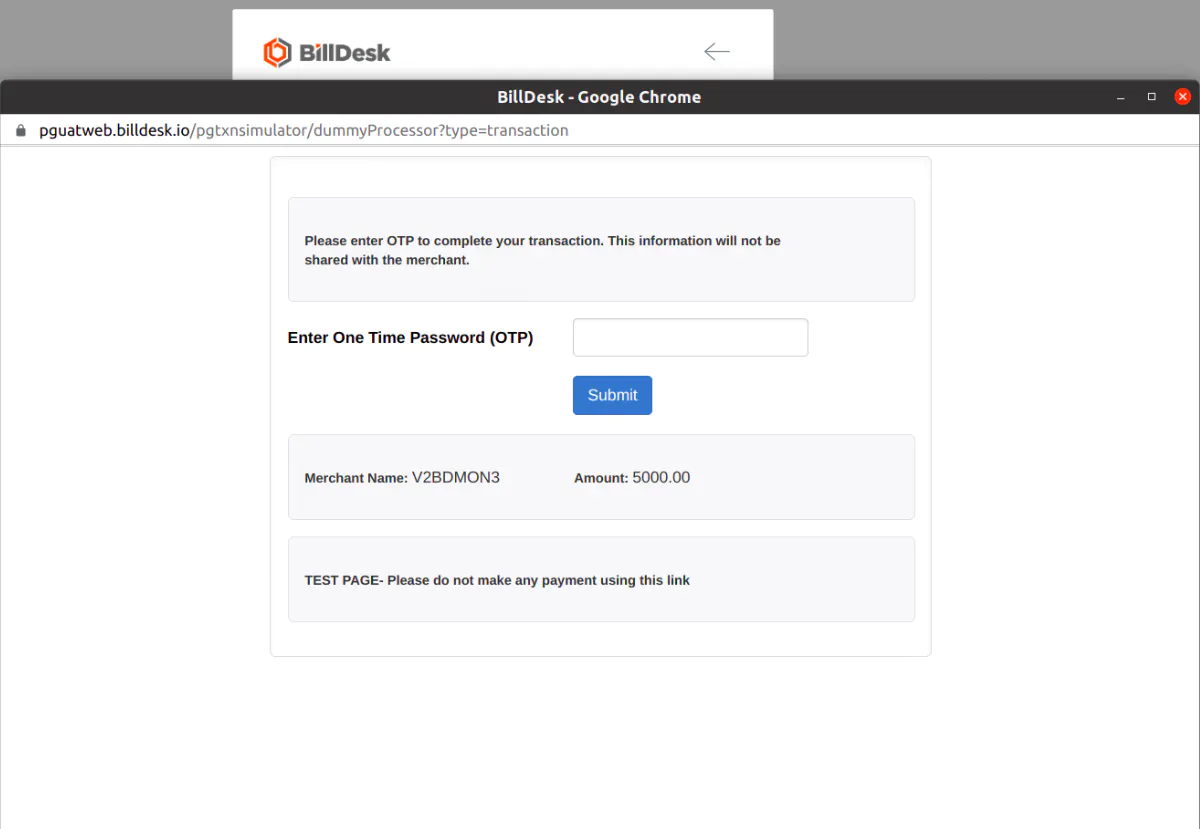
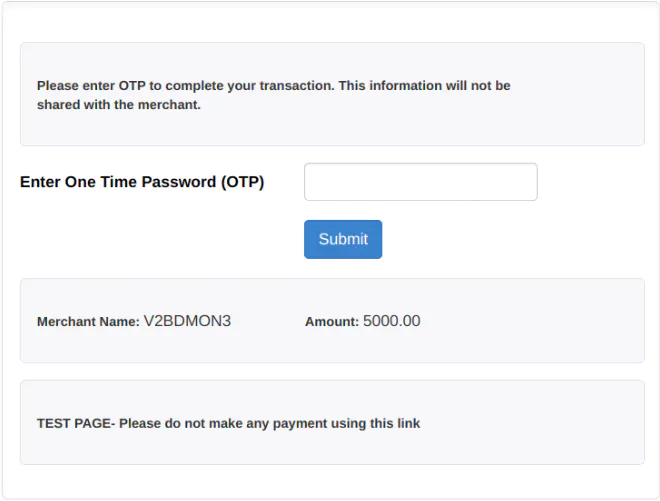
- BillDesk payment options modal screen will launch.
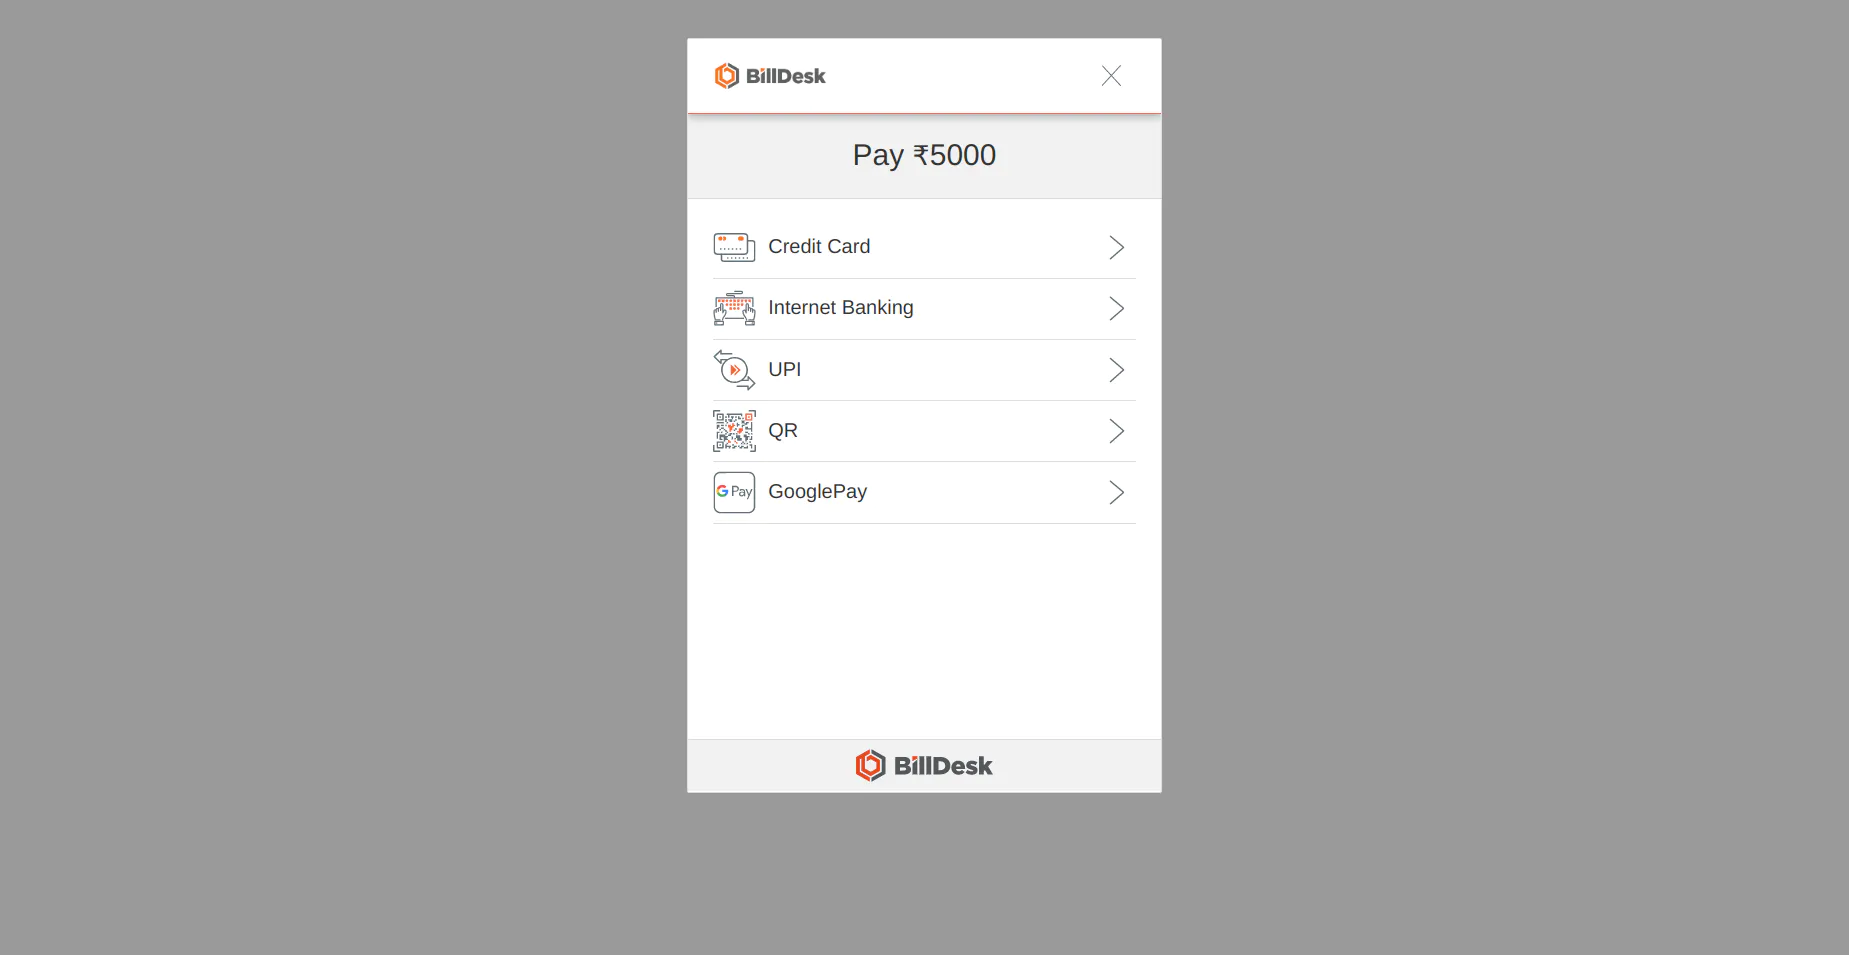
- Select the payment category and complete the payment process.
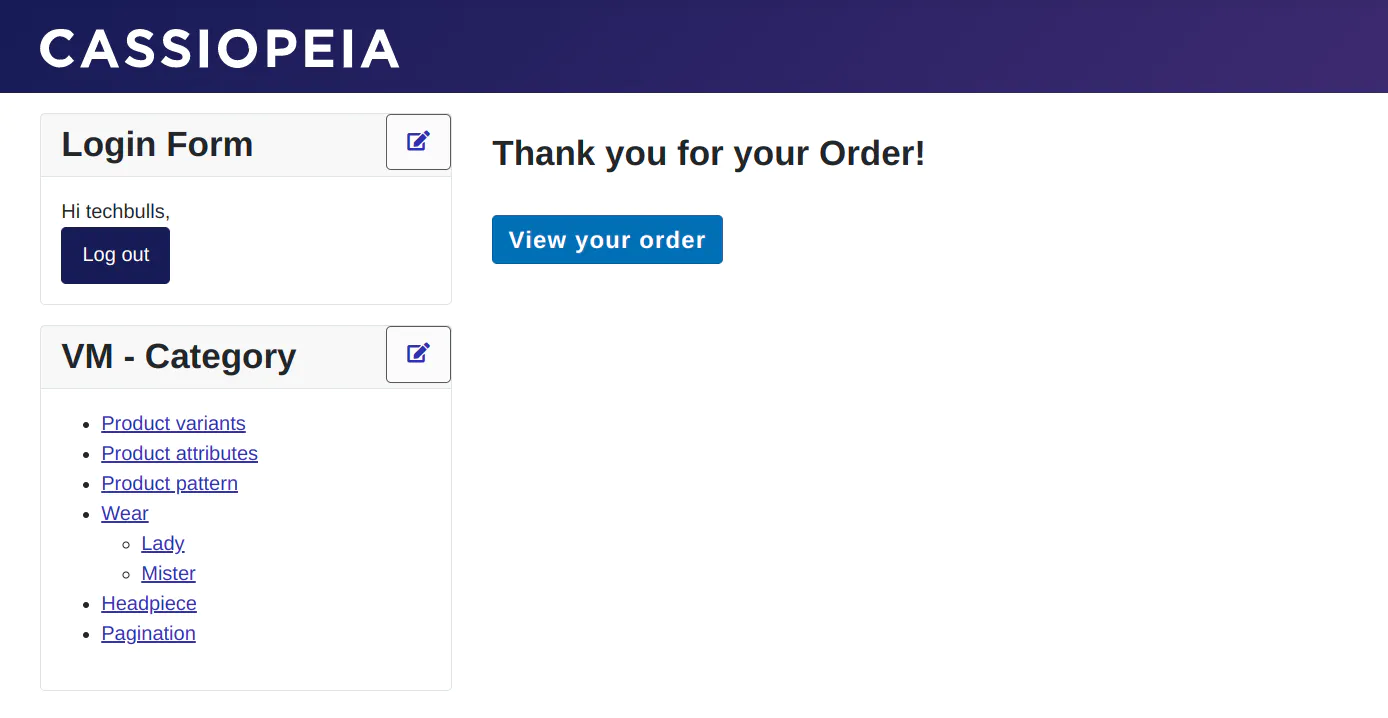
- Once the payment is successfully completed, merchant will be redirected to the success page.
Refund
To view the order listing page, click on Components → VirtueMart→ Orders.
- Change the status to 'Refunded' from the drop-down list of the particular order for which a refund is required.
Note that a refund can be made for orders with the status 'Confirmed'.
- Click the Update Order Status button to update the status of the selected order to 'Refunded'.

Order Listing
Merchant can view their orders at Components → VirtueMart → Orders.

SuccessMerchant will get detailed information about the selected transaction.
Troubleshooting
VirtueMart plugin logs are maintained in /log/virtuemart_billdesk_yyyy_mm_dd.log, where the merchant can check the reason of failure.
To confirm that PG connection is established, go to the Configuration page and click on TEST PG CONNECTIVITY.
Case 1: PG connectivity is successful.
Case 2: PG connectivity is unsuccessful.
If an error occurs during the connection, please refer to the following table:
| Error Code | Error Type | Error Description |
|---|---|---|
| GNAUE0006 | authentication_error | Request from unauthorized IP. |
| ORIRE0001 | invalid_request_error | Required parameter Merchant ID is missing. |