BillDesk Android SDK
Introduction
The BillDesk Android SDK allows you to seamlessly integrate the BillDesk payment suite with your application and start collecting payments from customers. The BillDesk Android SDK takes away the complexity of handling and integrating payment stack in a Native android project. The SDK opens the payment page in a webview and completes the payment journey within your app sans any external redirections
Salient Features
- Low code integration - Accept payments with a few easy steps and minimal code with this offering.
- Customizable- Customize aspects such as your company logo, payment methods as well as themes to give your customers an integrated experience.
Integration Steps

Flow diagram outlining the workflow
Step 1: Download the BillDesk Android SDK Libraries
Please contact your BillDesk Relationship manager to access the BillDesk Android SDK libraries
Note: We currently support API level 30 and above for Android
Step 2: Integrating the BillDesk SDK library
2.1 Integrating the library in the Kotlin App
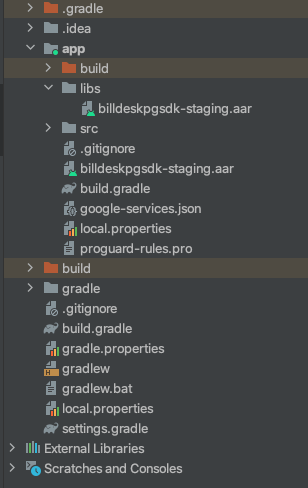
- Change your project panel mode to project and add the billdeskpgsdk-release.aar file
shared by BillDesk to the libs folder.
- Add aar file to build.gradle (Module: app) as follows
dependencies {
...
implementation fileTree(include: ['*.aar'], dir: 'libs')
...
}- Add following dependencies which is required for the SDK library, to build.gradle (Module:
app) as follows:
buildscript {

    ext {
        jackson_databind       = "2.14.2"
        jackson_core           = "2.14.2"
        jackson_annotations    = "2.14.2"
        jackson_kotlin_module  = "2.14.2"

        retrofit               = "2.9.0"
        okhttp                 = "3.12.13"

        lombok_version         = "1.18.24"
        kotlin_version         = "1.8.10"
        multidex_version       = "2.0.1"
    }

    dependencies {
        classpath "com.android.tools.build:gradle:8.9.1"
        classpath "org.jetbrains.kotlin:kotlin-gradle-plugin:$kotlin_version"
    }
}

dependencies {

    implementation fileTree(dir: "../app/libs", include: ["*.aar"])

    // AndroidX Core
    implementation "androidx.core:core-ktx:1.6.0"
    implementation "androidx.appcompat:appcompat:1.3.1"

    // UI
    implementation "com.google.android.material:material:1.4.0"
    implementation "androidx.constraintlayout:constraintlayout:2.0.4"

    // Navigation
    implementation "androidx.navigation:navigation-fragment-ktx:2.3.5"
    implementation "androidx.navigation:navigation-ui-ktx:2.3.5"

    // Testing
    testImplementation "junit:junit:4.+"
    androidTestImplementation "androidx.test.ext:junit:1.1.3"
    androidTestImplementation "androidx.test.espresso:espresso-core:3.4.0"

    // SVG to Bitmap converter
    implementation "com.caverock:androidsvg-aar:1.4"

    // Google Auth / SMS Retriever
    implementation "com.google.android.gms:play-services-auth:19.0.0"
    implementation "com.google.android.gms:play-services-auth-api-phone:17.5.1"

    // Retrofit
    implementation "com.squareup.retrofit2:retrofit:$retrofit"
    implementation "com.squareup.retrofit2:converter-jackson:$retrofit"

    // OkHttp
    implementation "com.squareup.okhttp3:logging-interceptor:$okhttp"

    // Jackson
    implementation "com.fasterxml.jackson.core:jackson-databind:$jackson_databind"
    implementation "com.fasterxml.jackson.core:jackson-core:$jackson_core"
    implementation "com.fasterxml.jackson.core:jackson-annotations:$jackson_annotations"
    implementation "com.fasterxml.jackson.module:jackson-module-kotlin:$jackson_kotlin_module"

    // Future support for older Android devices
    implementation "net.sourceforge.streamsupport:android-retrofuture:1.7.2"

    // JWE Encryption
    implementation "com.nimbusds:nimbus-jose-jwt:8.2"
    implementation "com.madgag.spongycastle:prov:1.58.0.0"
}- Add following require dependencies for the SDK library, to build.gradle (Module: root)
as follows:
repositories {
    google()
    mavenCentral()

    maven {
        url "https://jitpack.io"
    }
}
2.2 Integrating the library in the Java App
The integration steps for Java app remain the same as the Kotlin app. However an additional library for JVM to build.gradle (Module: app) is needed. Refer to the below sample for this
dependencies {
...
implementation "org.jetbrains.kotlin:kotlin-stdlib-jdk7:1.5.20"
...
}
Step 3: Preparing the Configurations
3.1 Creating an order
An order needs to be created for every transaction initiated using the BillDesk Android SDK.
To create an order use the Create Order API. The response of this API provides the bdorderIdand authorization & rdata values which are required to launch the BillDesk Androidr SDK (explained in the subsequent steps)
| Attribute | Description |
|---|---|
| mercid | Unique identifier provided by BillDesk for each merchant. |
| bdorderid | Value generated by BillDesk and provided in the Create Order API response. This value is unique for every order which is created. |
| authorization | An authorization token created by BillDesk and provided in the Create Order API response. This value is unique for every order which is created. |
{
	"objectid": "order",
	"orderid": "ORDERID280920230002",
	"bdorderid": "OAZY21S8GXAC",
	"mercid": "BDMERCID",
	"order_date": "2023-09-28T12:25:00+05:30",
	"amount": "2.00",
	"currency": "356",
	"ru": "https://www.merchanturl.com/response.jsp",
	"additional_info": {
		"additional_info1": "Details1",
		"additional_info2": "Details2"
	},
	"itemcode": "DIRECT",
	"createdon": "2023-09-28T12:33:36+05:30",
	"next_step": "redirect",
	"links": [
		{
			"href": "https://www.domainname.com/pgi/ve1_2/orders/ORDERID280920230002",
			"rel": "self",
			"method": "GET"
		},
		{
			"href": "https://www.domainname.com/pgi/MerchantPayment/",
			"rel": "redirect",
			"method": "POST",
			"parameters": {
				"mercid": "BDMERCID",
				"bdorderid": "OAZY21S8GXAC",
				"rdata": "89fd934cf8ca5ad76b8efbcf1d56caf8546a28d5b7876ad0f4070d48fa9b6bc00d3d5c85cda042d681d4593a28dd4ecf19b97c4f15eddff452885653e3f08425d35868fc0b05dd1af21d6eec07364e13b9a3b8f4fd56bdc6983fa732a7ab5267c2708da2b41de3edbb05919787dd5f7c52d17b8e9522e0965164100632eda8575a59483f667255b1c4b0f63bb4ef61d.70675f706172616d5f656e6333"
			},
			"valid_date": "2023-09-28T13:03:36+05:30",
			"headers": {
				"authorization": "OToken 89fd934cf8ca5ad76b8efbcf1d56caf8546a28d5b7876ad0f4070d48fa9b6bc00d3d5c85cda042d681d4593a28dd4ecf19b97c4f15eddff452885653e3f08425d35868fc0b05dd1af21d6eec07364e13b9a3b8f4fd56bdc6983fa732a7ab5267c2708da2b41de3edbb05919787dd5f7c52d17b8e9522e0965164100632eda8575a59483f667255b1c4b0f63bb4ef61d.70675f706172616d5f656e6333"
			}
		}
	],
	"status": "ACTIVE",
	"invoice": {
		"invoice_number": "11221133",
		"invoice_display_number": "11221133",
		"invoice_date": "2023-09-26T12:25:00+05:30",
		"customer_name": "John",
		"gst_details": {
			"cgst": "8.00",
			"sgst": "8.00",
			"igst": "0.00",
			"gst": "16.00",
			"cess": "0.00",
			"gstincentive": "5.00",
			"gstpct": "16.00",
			"gstin": "07AAAAA2194A1A1"
		}
	}
}
Preparing a request payloadEvery API request needs to encrypted. Similarly the response of each API is also returned in an encrypted format by BillDesk.
A step by step guide to prepare the request payload, transmit it and capture the response is available here.

Pick and choose your flowThe Create Order API is modular and supports 2 additional workflows as add-on's:
- Account Validation Service (AVS): - AVS can be used in case you wish to permit the customer to complete the transaction with a pre-defined account. More details on AVS available here.
- Split Settlement: Applicable in case you want the the transaction settlements in multiple accounts. More details on Split Settlement are available here.
Note: If you would like to implement these flows, please contact your BillDesk Relationship Manager prior to initiating the integration.

Validity of an orderEvery order created with the Create Order API is valid for a period of 30 minutes. Thus the customer needs to be complete a transaction within this timeframe.

3.2: Building the sdkConfig
The sdkConfig acts as a wrapper that encapsulates the necessary configurations and settings required for initializing and configuring the BillDesk Android SDK. It serves as the main configuration object for the SDK integration.
Attribute | Classification | Description |
|---|---|---|
responseHandler | mandatory | JavaScript callback function to receive the transaction's metadata after completion of the transaction journey |
flowType | mandatory | Set value as “payments” |
flowConfig | mandatory | A JSON object which defines how certain aspects of the the SDK will render |
merchantLogo | optional | base64 image of merchant’s logo. For optimal viewing, we recommend maintaining the logo size as 120 (width)*60 pixels(height) |
isUat | optional | Option to run the SDK in UAT environment:
|
var config = SdkConfig(
    "data:image/png;base64:eqwewqesddhgjdxsc==", // merchantLogo
    "payments",                                   // flowType
    flowconfig,                                   // FlowConfig
    responseHandler,                              // ResponseHandler
    false                                         // isUat Flag
)
3.3: Building the flowConfig
The flow config is an object which defines how certain aspects of the the SDK will render. It contains:
- Values received from the Create Order API (Step 1).
- Customizations which you would like to make on the BillDesk Android SDK.
Elements in the flow_config object:
Attribute | Classification | Description |
|---|---|---|
merchantId | mandatory | Unique identifier provided by BillDesk for each merchant. |
bdOrderid | mandatory | Value generated by BillDesk and provided in the Create Order API Response. This value is unique for every order which is created. |
authToken | mandatory | An authorization token created by BillDesk and provided in the Create Order API Response This value is unique for every order which is created. |
returnUrl | mandatory | The URL where the customer is to be redirected post completion of the payment on the BillDesk Web SDK. BillDesk will also
|
retryAttempt | optional | Number of retry attempts you want the customer to be able to get. In case, the earlier attempt to complete the transaction failed, the customer will get an option to retry the payment. |
prefs | optional | Changes in the SDK UI based on specific parameters: • payment_categories •allowed_bins: •netBanking object: 1. The "showPopularBanks" attribute is : "Y" Possible values which can be passed here are: 2. The "showPopularBanks" attribute is: "N” Note: Even if a list of banks has been passed in the "popularBanks" attribute in this case, no popular banks will be shown. |
var flowConfig: FlowConfig = PaymentsConfig(
    merchantId = "BDMERCID",
    bdOrderId = "TSFFDHWE",
    authToken = "OToken FDD5C104249A4CDAE734623",
    retryAttempt = 3,
    showConvenienceFeeDetails = true,
    paymentOptions = listOf("card", "emi", "nb", "gpay"),

    netBanking = NetBanking(),
    showAllowedBins = "Y",
    allowedBins = listOf("459150", "400000")
)

class NetBanking {

    var showPopularBanks: String? = "Y"

    var popularBanks: List<String>? = listOf(
        "Kotak Bank",
        "HDFC Bank",
        "ICICI"
    )
}
Step 4: Include the function to launch the SDK
To launch the Android SDK, please invoke the function: SdkFlowManager.startBilldeskFlow(activity, config)
activity – Merchant needs to pass their apps activity to the BillDesk SDK to launch the SDK.
config – Denotes the SDK configurations as mentioned in section 4.2.2 of this document.
Step 5: Capture the transaction response
This Step explains the workflow involved the capturing the transaction response once the customer has completed a transaction on the BillDesk Android SDK
5.1 : Initialize the SDK Response Handler
The first step in processing the transaction response received from the SDK is to initialize the ResponseHandler. The ResponseHandler is an essential component that handles the responses generated by the SDK for the transactions. Please refer to the below sample code for the ResponseHandler
private val responseHandler = object : ResponseHandler {

    override fun onTransactionResponse(txnInfo: TxnInfo) {

        Log.d(TAG, "Callback Received via responseHandler(), Txn:: $txnInfo")

        when (txnInfo.sdkState) {

            SdkState.USER_CANCELED,
            SdkState.PAYMENT_ABORTED -> {

				// bellow toast can be replaced as per merchant requirement
                Toast.makeText(
                    this@MainActivity,
                    "Callback 'onTransactionResponse()' called -> USER_CANCELED / PAYMENT_ABORTED",
                    Toast.LENGTH_LONG
                ).show()

                Log.d(
                    TAG,
                    "Callback 'onTransactionResponse()' called -> USER_CANCELED / PAYMENT_ABORTED"
                )
            }

            else -> {

                // bellow toast can be replaced as per merchant requirement
				Toast.makeText(
                    this@MainActivity,
                    "Callback 'onTransactionResponse()' called -> encryResponse :: ${txnInfo.encryResponse}",
                    Toast.LENGTH_LONG
                ).show()

                Log.d(
                    TAG,
                    "Callback 'onTransactionResponse()' called -> encryResponse :: ${txnInfo.encryResponse}"
                )
            }
        }
    }

    override fun onError(sdkError: SdkError) {

        // bellow toast can be replaced as per merchant requirement
		Toast.makeText(
            this@MainActivity,
            "Callback 'onError()' called\n${sdkError}",
            Toast.LENGTH_LONG
        ).show()

        Log.d(TAG, "Callback Received via responseHandler()")
        Log.d(TAG, sdkError.toString())
    }
}
5.2 : Implement Response Handling Functions
Next, you need to implement two functions within the ResponseHandler class: 1. onTransactionResponse and 2.onError. These functions will be called by the SDK to provide the results of a transaction or report any errors encountered during the process.
| Attribute | Description |
|---|---|
| ResponseHandler Class | The ResponseHandler class is an interface that defines two methods for handling transaction responses and errors |
| onTransactionResponse | This method is called when a transaction response is received from BillDesk. It provides the TxnInfo object that contains information about the transaction |
| onError | This method is called when an error occurs during the transaction process. It provides the SdkError object that contains details about the error. |
TxnInfo Class:
The TxnInfo class represents transaction information and is used to encapsulate the details of a transaction response.
Txn(
status='PAYMENT_ATTEMPTED'
)
The status attribute in the TxnInfo object can return 4 possible values. The below table below describes
each status in detail
| Status | Description | Next step |
|---|---|---|
| PAYMENT_ATTEMPTED | This status indicates that the user has completed the transaction journey on the SDK | In this case, please use the Retrieve Transaction API to retrieve the status of the transaction and display it appropriately to the customer |
| USER_CANCELLED | This status indicates that the user has closed the SDK by clicking on the cross button on the top right corner of the SDK | For this status there is no need to query the status of the transaction as the user has not completed a transaction |
| PAYMENT_ABORTED | This status indicates that the transaction has not been completed by the user | For this status there is no need to query the status of the transaction as the user has not completed a transaction |
| SECURITY_CHECK | This status indicates potential security risks detected on the users device (eg. rooted device detection, emulator detection, tampering detection etc) | For this status there is no need to query the status of the transaction as the user has not completed a transaction |
Next Steps
Once the transaction is completed, the below 3 APIs are available to Create a Refund or Query the status of a transaction / refund
Transaction Status CheckYou can check the status of a transaction at any point using the Retrieve Transaction API
RefundsYou can initiate a refund for any successful transaction using the Create Refund API
Refund Status CheckYou can check the status of a Refund at any point using the Retrieve Refund API